Grain Brewing Equipment
Overview of Grain Brewing Equipment
Grain brewing is both an art and a science, requiring a precise balance of skill, knowledge, and the right equipment. Whether you’re a homebrewer just starting or a seasoned professional looking to upgrade your setup, understanding the intricacies of grain brewing equipment is essential to perfecting your craft. This guide will dive deep into the world of grain brewing equipment, covering everything from the basics to the more advanced considerations that will help you make informed decisions.
The equipment used in grain brewing plays a critical role in the quality of the final product. From choosing the right brewing system to understanding the intricacies of installation, operation, and maintenance, this guide will walk you through every aspect of the process. We’ll also compare different equipment types, analyze the pros and cons, and provide insights on selecting suppliers, ensuring that you’re well-equipped to make the best decisions for your brewing needs.

Grain Brewing Equipment Guide
When it comes to grain brewing, the choice of equipment can make or break your brewing experience. Below, we break down the key pieces of equipment you’ll need, with a detailed explanation of their role in the brewing process.
Key Equipment in Grain Brewing
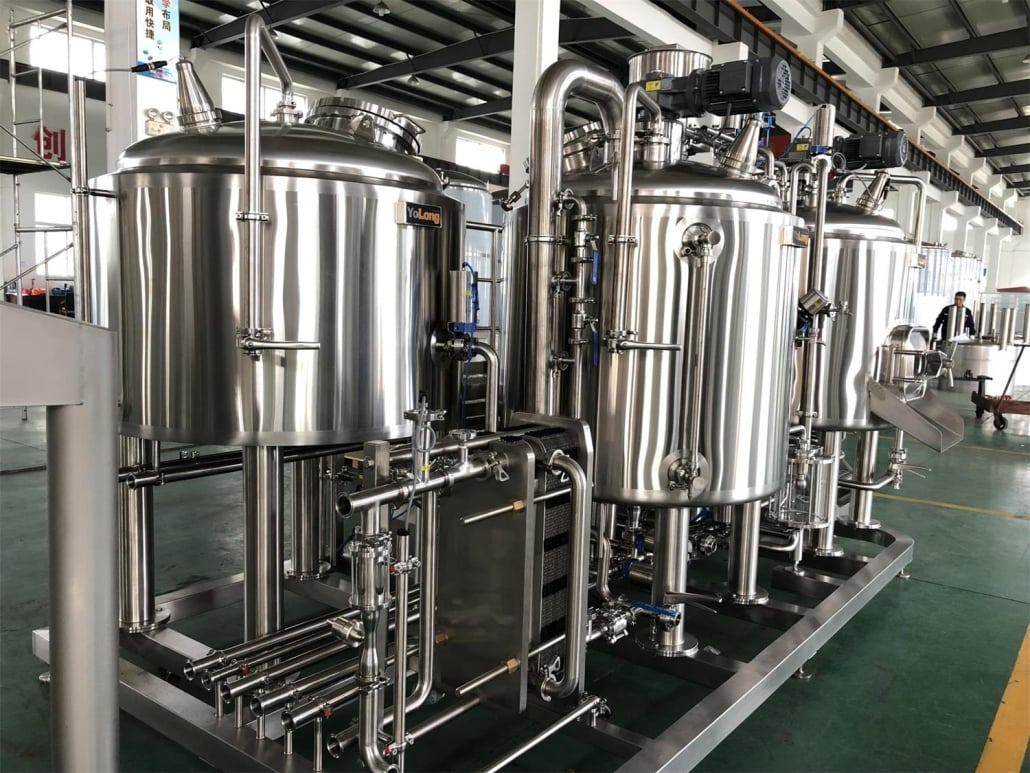
- Malt Mill: The malt mill is where the brewing process begins. This piece of equipment is used to crush the grains to a specified consistency, which is essential for efficient starch conversion during mashing. The quality of the mill can significantly affect the efficiency of the brew, so investing in a good one is crucial.
- Mash Tun: The mash tun is the vessel where the crushed grains are mixed with hot water to extract fermentable sugars. This is a critical step in the brewing process, as it determines the sugar content and, ultimately, the alcohol content of the final product. Mash tuns can be insulated to maintain temperature or connected to a heating source for precise control.
- Lauter Tun: After mashing, the wort (sugar water) is separated from the spent grains in the lauter tun. This process involves sparging, where additional water is rinsed through the grain bed to extract as much sugar as possible. The design of the lauter tun, including the false bottom and sparging arms, can influence the clarity and efficiency of the wort extraction.
- Brew Kettle: The brew kettle is where the wort is boiled, hops are added, and unwanted compounds are evaporated. This is also where the wort is sterilized, ensuring that no unwanted microorganisms survive the brewing process. Brew kettles come in various sizes and materials, with different features like built-in thermometers and whirlpool arms to assist in hop addition and wort clarification.
- Fermentation Tank: Once the wort is cooled, it is transferred to the fermentation tank, where yeast is added to begin the fermentation process. The fermentation tank must be able to maintain a consistent temperature, as this is crucial for yeast activity and flavor development. Tanks can vary in size, with options for conical bottoms, which allow for easier yeast removal and cleaning.
- Cooling System: After boiling, the wort needs to be quickly cooled to a temperature where yeast can be safely added without being killed by the heat. This is typically done using a heat exchanger or immersion chiller. The cooling system’s efficiency can significantly impact the overall brewing time and the final beer’s clarity.
- Pumps and Hoses: Throughout the brewing process, wort and other liquids need to be transferred between vessels. Pumps and hoses play a critical role in moving these liquids efficiently and without contamination. The choice of pump type (centrifugal, diaphragm, or peristaltic) and hose material can affect flow rate, sanitation, and durability.
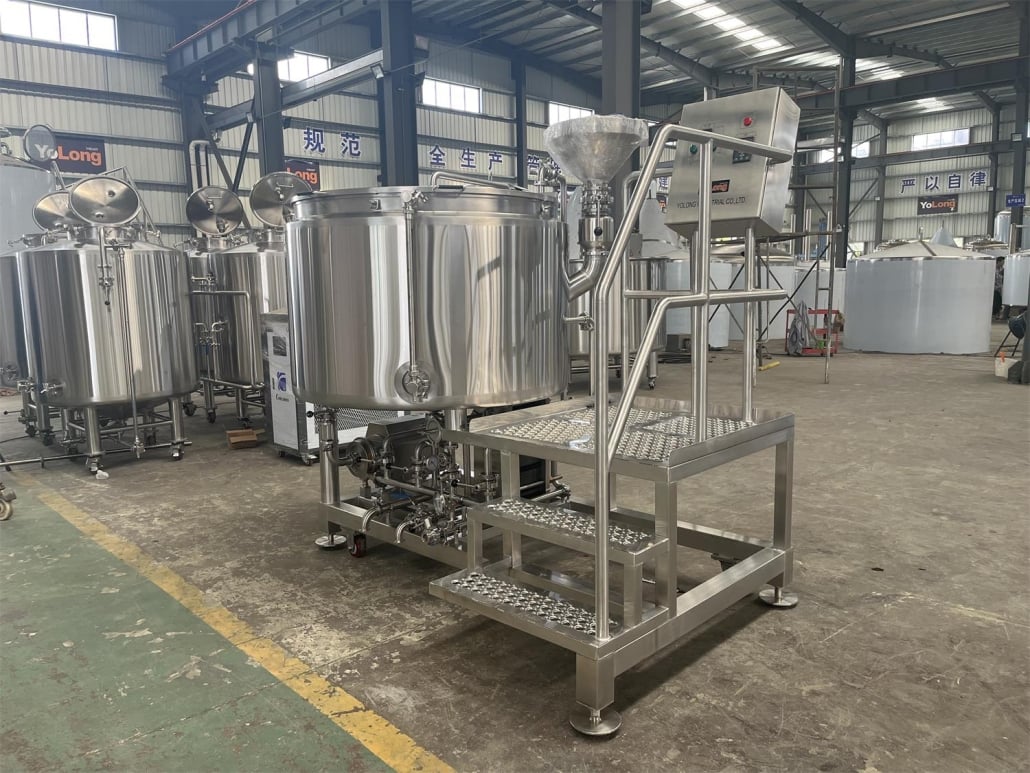
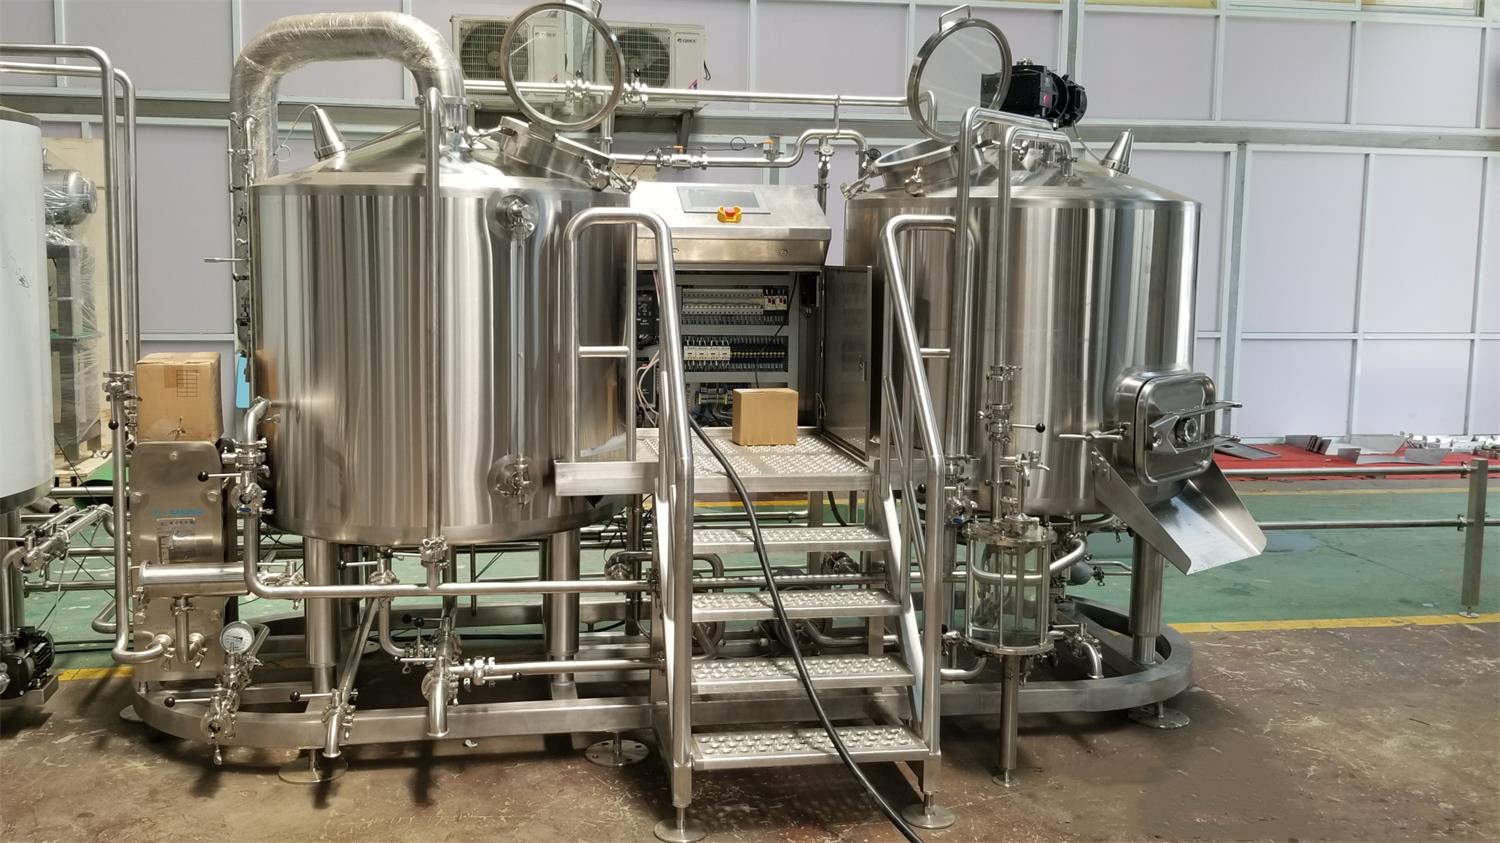
- Control Panel: Modern brewing systems often include a control panel that allows the brewer to monitor and adjust temperatures, pump speeds, and other variables throughout the process. A well-designed control panel can streamline the brewing process and reduce the likelihood of errors.
- Cleaning Equipment: Proper cleaning and sanitation are essential in brewing to avoid contamination and ensure the quality of the final product. This includes CIP (Clean-In-Place) systems, cleaning brushes, and sanitizing solutions.
Equipment Types and Their Applications
| Equipment Type | Description | Application |
|---|---|---|
| Malt Mill | Grinds malted barley to specific consistencies | Essential for starch conversion efficiency |
| Mash Tun | Vessel for mixing crushed grains with hot water | Determines sugar content and influences flavor |
| Lauter Tun | Separates wort from spent grains | Crucial for wort clarity and sugar extraction |
| Brew Kettle | Boils wort and adds hops | Sterilizes wort, influences hop flavor and aroma |
| Fermentation Tank | Where yeast is added to wort to begin fermentation | Affects yeast activity, flavor, and alcohol content |
| Cooling System | Cools wort rapidly after boiling | Essential for yeast health and beer clarity |
| Pumps and Hoses | Transfers liquids between brewing vessels | Facilitates efficient, contamination-free brewing |
| Control Panel | Monitors and adjusts brewing variables | Streamlines process, reduces errors |
| Cleaning Equipment | Ensures sanitation of brewing equipment | Prevents contamination, maintains quality |
The Brewing Process: Grain Brewing Equipment in Action
The brewing process is where all the pieces of equipment come together. Here’s a detailed walk-through of each step in the brewing process, highlighting the role of each piece of equipment.
Step 1: Milling the Grains
The process begins with the malt mill, where malted barley and other grains are crushed to break the husks and expose the starches inside. The consistency of the crush is crucial – too fine, and you risk creating a sticky mash that’s difficult to sparge; too coarse, and you’ll miss out on extracting all the fermentable sugars.
Step 2: Mashing
The crushed grains are then transferred to the mash tun, where they are mixed with hot water in a process known as mashing. This step is all about temperature control. The water’s heat activates enzymes in the malt, converting starches into fermentable sugars. The mash tun’s design – whether insulated or heated – will determine how well you can maintain the optimal temperature range for enzymatic activity.
Step 3: Lautering
Once mashing is complete, the mash is transferred to the lauter tun. Here, the liquid wort is separated from the grain husks. The wort is collected through the false bottom of the lauter tun while additional hot water is sparged over the grain bed to rinse out any remaining sugars. A well-designed lauter tun will help ensure that the wort is clear and that as much sugar as possible is extracted from the grains.
Step 4: Boiling
The wort is then moved to the brew kettle for boiling. This step is where hops are added, contributing bitterness, flavor, and aroma to the beer. Boiling also sterilizes the wort, driving off volatile compounds that can cause off-flavors. The brew kettle’s design, such as whirlpool arms, can assist in evenly distributing the hops and removing unwanted solids from the wort.
Step 5: Cooling
After boiling, the wort needs to be cooled quickly to prevent contamination and prepare it for fermentation. A cooling system, like a plate chiller or immersion chiller, rapidly brings the temperature down to a level where yeast can be safely pitched. The efficiency of your cooling system directly impacts the clarity of your final product, as slow cooling can lead to unwanted haze formation.
Step 6: Fermentation
The cooled wort is transferred to a fermentation tank, where yeast is added to begin the fermentation process. Over the next few days to weeks, the yeast will consume the sugars in the wort and produce alcohol and carbon dioxide. The fermentation tank’s temperature control features are crucial here, as different yeast strains require specific temperatures to produce the desired flavors.
Step 7: Cleaning and Sanitizing
After fermentation is complete and the beer has been packaged, the brewing equipment must be thoroughly cleaned and sanitized. This prevents any residual yeast or bacteria from contaminating the next batch. Cleaning in Place (CIP) systems are often used in larger breweries, while homebrewers may rely on manual scrubbing and sanitizing solutions.
Brewing Equipment Capacity, Space, Design, and Customization
When planning your brewing setup, it’s important to consider the capacity, space requirements, and design options available. These factors will influence not only the quantity of beer you can produce but also the efficiency and ease of your brewing process.
Capacity, Space, and Design Considerations
| Factor | Details |
|---|---|
| Capacity | Brewing systems range from small 5-gallon setups for homebrewers to multi-barrel systems for commercial operations. The capacity you choose will depend on your production goals. |
| Space Requirements | Brewing equipment can take up significant space, especially as capacity increases. Ensure you have enough room for all equipment, as well as for movement and safety. |
| Design | Brewing systems come in various designs, from compact, all-in-one units to modular systems where each piece of equipment is separate. The design choice will affect the ease of use, customization,and scalability. |
| Customization | Some brewers opt for custom-built systems tailored to their specific needs. This can include specific tank sizes, heating options, or advanced control systems. Customization can improve efficiency but often comes at a higher cost. |
Suppliers and Price Range for Grain Brewing Equipment
The choice of supplier can have a significant impact on the quality and cost of your brewing equipment. Here, we provide an overview of some well-known suppliers and the general price ranges you can expect.
Suppliers and Price Range Overview
| Supplier | Equipment Offered | Price Range |
|---|---|---|
| BrewMagic by SABCO | Pilot brewing systems, automated systems | $5,000 – $15,000 |
| SS Brewtech | Homebrewing and small-scale commercial systems | $500 – $10,000 |
| Blichmann Engineering | High-quality homebrewing equipment | $200 – $5,000 |
| MoreBeer | Comprehensive brewing equipment for all levels | $50 – $10,000 |
| Spiedel | European-made brewing systems | $1,000 – $20,000 |
Installation, Operation, and Maintenance of Grain Brewing Equipment
Installing, operating, and maintaining your brewing equipment is critical to ensuring long-term performance and quality results. Below, we break down these processes and offer some best practices.
Installation, Operation, and Maintenance Considerations
| Aspect | Details |
|---|---|
| Installation | Proper installation ensures that all equipment functions as intended. This may involve professional setup, especially for larger or more complex systems. Ensure all connections are secure, and components are aligned correctly. |
| Operation | Familiarize yourself with the equipment’s manual and operational guidelines. Each piece of equipment may have specific operational procedures that must be followed for optimal performance. Regular calibration and monitoring are essential. |
| Maintenance | Routine maintenance, such as cleaning, lubrication, and part replacement, is vital for extending the life of your brewing equipment. Pay special attention to moving parts, seals, and hoses, as these can wear out over time. Keeping detailed maintenance records can help you stay on top of necessary repairs and replacements. |
Choosing the Right Supplier for Grain Brewing Equipment
Selecting the right supplier for your grain brewing equipment is as important as choosing the equipment itself. Here’s what you need to consider when making your decision.
How to Choose the Right Supplier
| Consideration | Details |
|---|---|
| Reputation | Research potential suppliers’ reputations by reading reviews and seeking recommendations from other brewers. A well-established supplier with a track record of quality and reliability is a safer choice. |
| Product Range | Ensure the supplier offers a wide range of equipment that meets your specific brewing needs. A supplier with a comprehensive catalog can provide better support and more options for customization. |
| Customer Support | Look for suppliers that offer strong customer support, including installation assistance, troubleshooting, and replacement parts. Good customer support is invaluable, especially if you encounter issues with your equipment. |
| Pricing and Value | While it’s tempting to choose the lowest-cost option, consider the long-term value of your investment. Higher-quality equipment may have a higher upfront cost but can save money in the long run through better performance and durability. |
| Warranty and Service | Check the warranty and service terms offered by the supplier. A robust warranty and accessible service options can provide peace of mind and protect your investment. |
Comparing Grain Brewing Equipment: Pros, Cons, Advantages, and Limitations
When choosing grain brewing equipment, it’s important to weigh the pros and cons of different options. This section provides a comparison to help you make an informed decision.
Advantages and Limitations of Grain Brewing Equipment
| Equipment | Advantages | Limitations |
|---|---|---|
| Malt Mill | High-quality mills increase efficiency and consistency in mashing. | Can be expensive; requires calibration and maintenance. |
| Mash Tun | Insulated or heated options offer precise temperature control for mashing. | Larger tuns take up more space and can be difficult to clean. |
| Lauter Tun | Well-designed tuns improve wort clarity and extraction efficiency. | Complex systems can be costly and require careful operation. |
| Brew Kettle | Essential for sterilization and hop utilization. | Large kettles require significant energy to heat and maintain. |
| Fermentation Tank | Conical designs simplify yeast removal and cleaning. | Temperature control systems can be expensive to install. |
| Cooling System | Rapid cooling prevents off-flavors and haze. | Inefficient systems can extend brewing time and waste energy. |
| Control Panel | Automates and simplifies brewing operations. | High-tech panels can be costly and require technical know-how. |
| Cleaning Equipment | Ensures sanitation and quality of the final product. | CIP systems can be expensive and complex for small brewers. |

FAQs
What is the most essential piece of equipment for grain brewing?
The most essential piece of equipment for grain brewing is arguably the brew kettle. It is where the wort is boiled, hops are added, and the sterilization process occurs. Without a good brew kettle, the entire brewing process can be compromised.
How much does it cost to set up a grain brewing system?
The cost to set up a grain brewing system can vary widely depending on the scale and quality of the equipment. For homebrewing, a basic setup might start at around $1,000, while more advanced or commercial systems can run into tens of thousands of dollars.
Can I customize my brewing equipment?
Yes, many suppliers offer customization options for brewing equipment. Customizations can include specific sizes, heating options, advanced control systems, and more. However, customizations often come with additional costs and longer lead times.
How often should brewing equipment be cleaned?
Brewing equipment should be cleaned after every brew to prevent contamination and ensure the quality of the final product. Regular maintenance, including deep cleaning of all components, is also recommended.
What is the best material for brewing equipment?
Stainless steel is the preferred material for most brewing equipment due to its durability, ease of cleaning, and resistance to corrosion. It is also less reactive than other metals, ensuring that the flavor of the beer is not affected.
Share this entry
Interested in learning more about Brewing Systems including additional details and pricing information? Please use the form below to contact us!
YOLONG BREWERY EQUIPMENT FAQS
- Commercial Brewery / Craft Brewery / Microbrewery / Nanobrewery
- What is The Difference Between Craft Beer and Industrial Beer?
- The Bespoke Differences In Custom Brewing Systems
- Everything You Need to Know About Kettle Souring
- How to Choose Brewing Equipment for Your business?
- How To Choose The-Best Partner To Build Your Commercial Microbrewing System?
- Two Detection Sensors That You Need To Use In Your Brewhouse System
- Remote Control Applications in Brewing Equipment/How does it work?
- How To Clean Your Brand New Brewery Tanks?

