The Ultimate Guide to Mastering Brewing Equipment in 2025
Types of Brewing Equipment
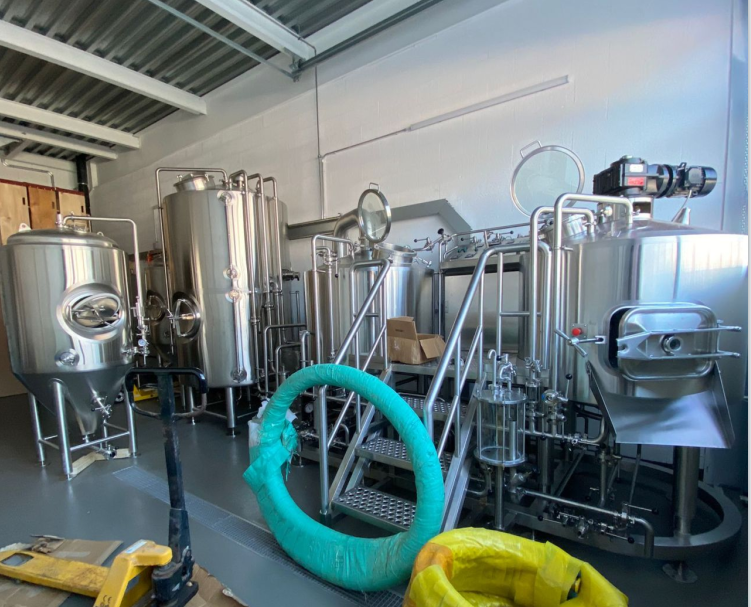
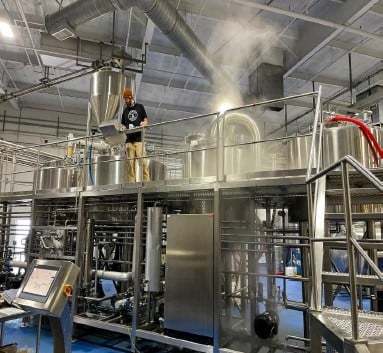
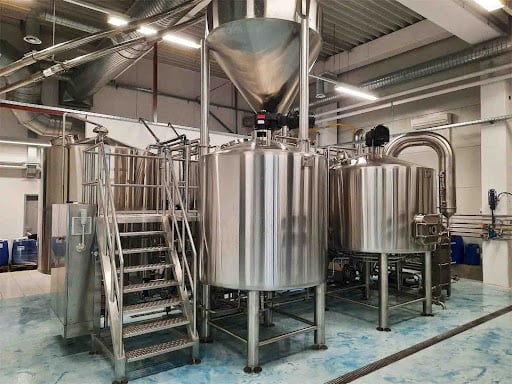
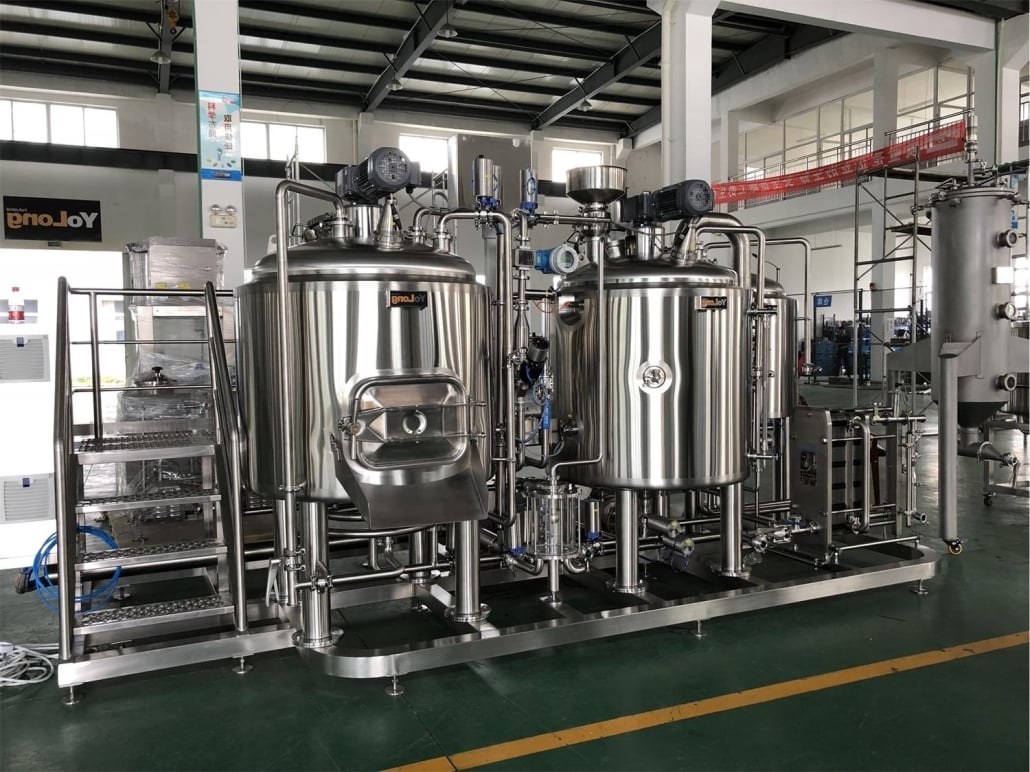
Brewing Kettles (Boil Kettles)
This is where the magic begins. Brewing kettles are large pots (often stainless steel or aluminum) where you boil your wort. Sizes can range from a humble 5-gallon pot for home brewers to industrial 10-barrel monsters.
- Stainless Steel vs Aluminum: Stainless is more durable and doesn’t react with acidic ingredients. Aluminum heats faster but can oxidize.
- Kettle Add-ons: Look for kettles with volume markers, ball valves, and thermometers for better control.
Mash Tuns
Mash tuns are where crushed grains meet hot water to create the sugar-rich liquid that becomes beer. Insulated and often equipped with false bottoms to separate liquid from grain, these tanks are vital in converting starches to sugars.
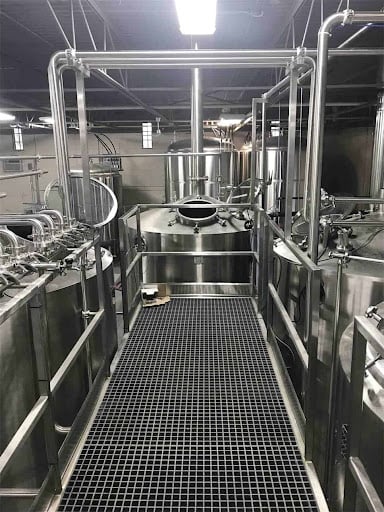
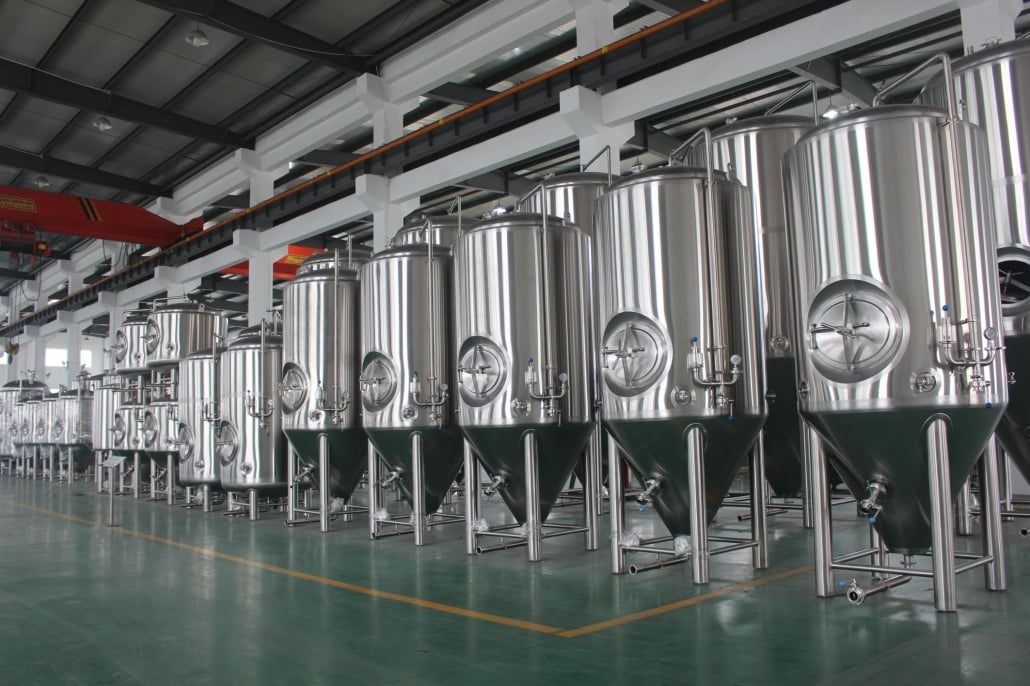
Fermenters
Once your wort is cooled, it’s transferred to a fermenter where yeast works its magic. Fermenters come in:
- Plastic buckets (cheap, lightweight, but scratch easily)
- Glass carboys (great for visibility but fragile)
- Stainless steel conicals (the pro’s choice—easy to clean, pressure-ready, and long-lasting)
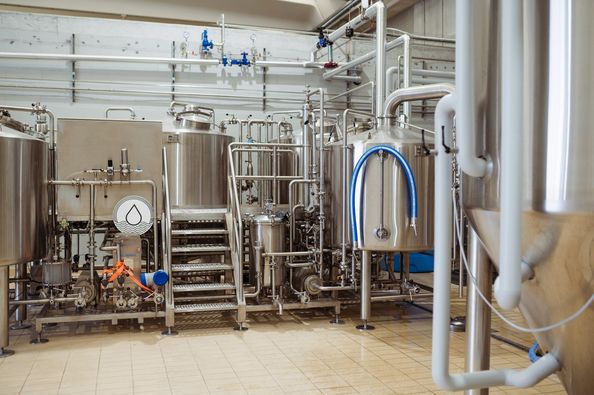
Cooling Systems (Wort Chillers)
You can’t pitch yeast into hot wort unless you want dead yeast and funky beer. Enter wort chillers:
- Immersion chillers: Coils you dip in your kettle.
- Counterflow chillers: More efficient but complex.
- Plate chillers: Fastest and most compact but need cleaning diligence.
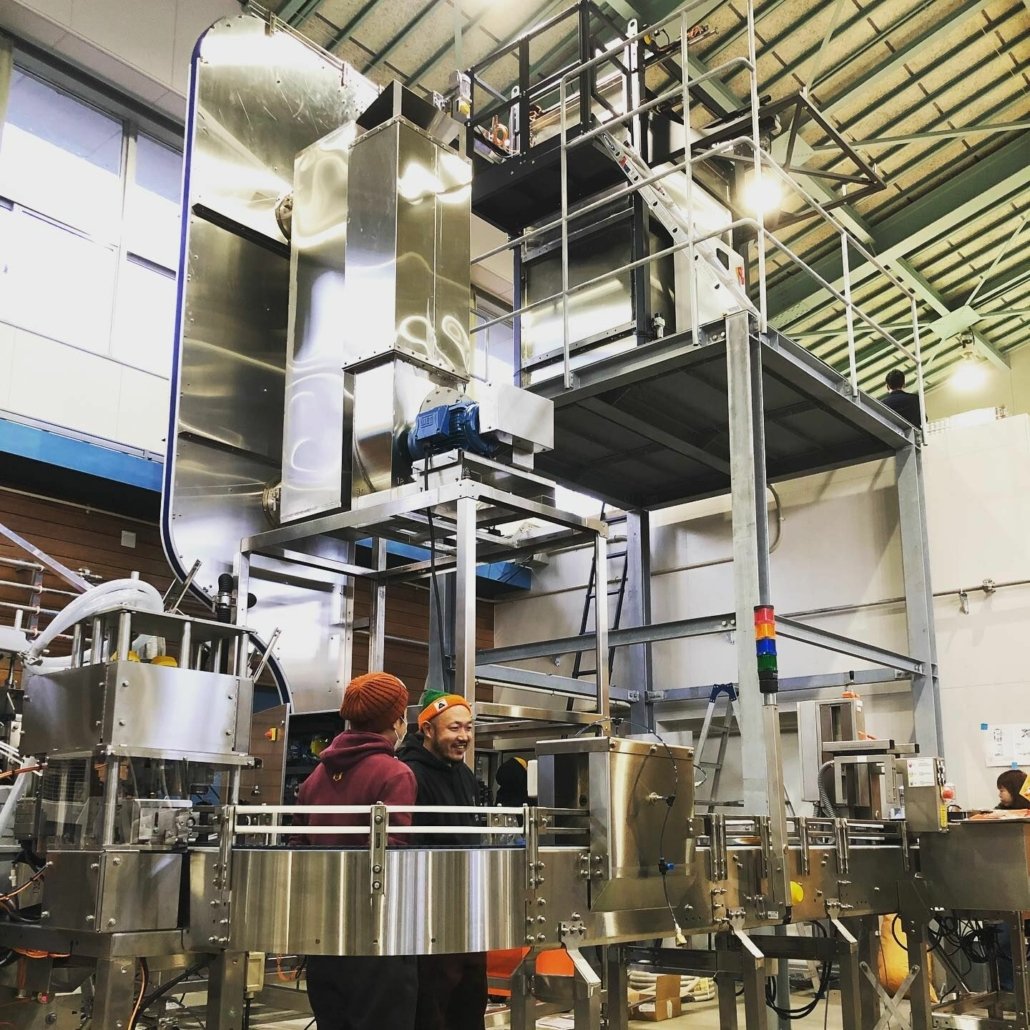
Bottling and Kegging Systems
Post-fermentation, you need to store your brew. Bottling involves cappers, sanitized bottles, and priming sugar. Kegging requires CO2 tanks, regulators, and cornelius (Corny) or commercial kegs.
Monitoring Tools
- Hydrometers and refractometers: Measure gravity to track fermentation.
- pH meters: Keep your mash and wort in the ideal acidity range.
Cleaning and Sanitizing Equipment
Brewing success starts with cleanliness. Use food-grade sanitizers (like Star San), scrub brushes, and auto-siphons to keep your gear beer-ready.
How to Choose the Right Brewing Equipment
Alright, so you know what’s out there. But how do you pick the perfect brewing gear for your setup, skill level, and budget? It’s kind of like picking a guitar—you need to match it to your style, your space, and your goals.
Step 1: Define Your Brewing Goals
- Just a hobby? A basic homebrew kit with a 5-gallon kettle, plastic fermenter, and siphon will do.
- Planning a nano or microbrewery? You’ll need a full system: mash tun, boil kettle, fermenters, heat source, pumps, and glycol chillers.
Step 2: Consider Your Space
- Apartment brewers need compact, quiet setups. An electric all-in-one system like the Grainfather G70 is a solid bet.
- Garage or basement setups can handle larger propane kettles or 3-vessel systems.
Step 3: Budget Smart
Here’s a table breaking down approximate costs across different brewing setups:
Brewing Equipment Costs by Setup Type
| Setup Type | Estimated Cost Range | Best For |
|---|---|---|
| Entry-Level Home Kit | $100 – $300 | Beginners |
| Mid-Range Hobby Kit | $400 – $1,000 | Regular homebrewers |
| All-in-One Systems | $1,000 – $3,000 | Enthusiasts, compact setups |
| 3-Vessel Systems | $3,000 – $10,000 | Advanced home/commercial brewers |
| Commercial Systems | $10,000+ | Microbreweries and production use |
Step 4: Choose Based on Features
Look for user-friendly features: digital temperature controls, integrated pumps, modular design, and ease of cleaning.
Top 5 Best Brewing Equipment in 2025
Let’s break down the big players in 2025 that have brewers buzzing. This list is based on performance, customer reviews, ease of use, and bang-for-your-buck.
Brewing Equipment Comparison Table: Top Picks of 2025
| Model | Type | Capacity | Price Range | Pros | Cons |
|---|---|---|---|---|---|
| Grainfather G70 | All-in-One Electric | 18.5 gal | $1,599 | Compact, Wi-Fi control, solid support | Pricey for beginners |
| Anvil Foundry 10.5 | All-in-One Electric | 10.5 gal | $449 | Budget-friendly, stainless build, built-in pump | Slower heating |
| Ss Brewtech Brew Bucket | Stainless Fermenter | 7 gal | $229 | Conical, stackable, pressure-ready | No cooling jacket |
| Spike Trio System | 3-Vessel Electric | 20 gal | $6,000+ | Professional grade, custom options, durable | Expensive, large footprint |
| BrewTools B80 Pro | High-End Electric | 21 gal | $2,700 | Touchscreen, precise, beautiful design | Learning curve |
Each of these systems has its own vibe. The Grainfather G70 is like the Tesla of brewing—sleek, digital, and powerful. The Spike Trio is your heavy-duty pickup truck. The Anvil Foundry? A reliable, affordable workhorse.
Maintenance Tips & Common Mistakes to Avoid
Here’s the truth: even the best gear can ruin a brew if you don’t treat it right. Proper maintenance not only saves you money but also preserves the flavor integrity of your beer.
Top Maintenance Tips
- Sanitize everything. Before and after every use. Think of bacteria as the enemy army storming your brew.
- Clean your kettles with non-abrasive tools. Scratches can harbor bacteria.
- Check seals, valves, and gaskets regularly. Leaks and pressure loss? Buzzkill.
- Replace old tubing. Over time, it gets brittle and nasty.
- Descale heating elements on electric systems to prevent inefficiency.
Common Brewing Mistakes
- Poor temperature control: Leads to off-flavors or stalled fermentation.
- Using chlorinated tap water: Hello, band-aid beer. Use filtered water.
- Neglecting yeast health: Old or under-pitched yeast = sad beer.
- Not calibrating instruments: Hydrometers and pH meters need love too.
FAQ
| Question | Answer |
|---|---|
| What equipment do I need to start home brewing? | A kettle, fermenter, siphon, bottles, sanitizer, and a hydrometer. |
| Is electric brewing better than propane? | Electric is safer and more precise; propane is cheaper and faster. |
| How big should my brew kettle be? | At least 1.5x your batch size. For 5 gallons, aim for 8-gallon kettle. |
| Do I need a wort chiller? | Yes, unless you enjoy waiting hours and risking contamination. |
| Can I brew beer in plastic buckets? | Yes, but they scratch easily and are prone to contamination. |
| How often should I replace hoses and seals? | Every 6-12 months or sooner if discolored/cracked. |
| What’s the easiest all-in-one system for beginners? | The Anvil Foundry 10.5 is a solid, user-friendly choice. |
Additional FAQs on Brewing Equipment (2025)
1) What’s the best upgrade path from an entry all-in-one to pro-level brewing equipment?
- Stepwise: add precision temp control (ferm chamber + thermowell), closed transfers and spunding, then a dedicated stainless conical. Next, move to a small 2–3 vessel system with a plate chiller and pump-driven CIP.
2) How do I decide between plate, counterflow, and immersion chillers?
- Plate: fastest and most compact; requires meticulous cleaning and good pre-filtering. Counterflow: robust and efficient; easier to rinse. Immersion: simplest and low-risk; slower unless paired with recirculation and ice pre-chill.
3) What pump specs should I look for in 2025 systems?
- For home to nano scale: 1/25–1/8 HP magnetic-drive pumps, 3–7 gpm at 5–12 ft head, 240°F rated, with tri-clamp or camlock fittings and VFD or PWM speed control for gentle lautering/transfers.
4) Are pressure fermenters safe for lagers and IPAs at home?
- Yes, if used within vessel ratings. Ferment 5–12 psi for ales to limit esters; 10–15 psi for lagers to suppress sulfur/ester formation and naturally carbonate. Always verify PRV function and use a calibrated spunding valve.
5) Which QA tools offer the biggest quality gains per dollar?
- Accurate thermometer and pH meter, refractometer, DO/TPO checks at packaging (even via occasional lab/mobile service), and a reliable carbonation/pressure gauge. Add seam micrometer or outsource seam audits if canning.
2025 Industry Trends in Brewing Equipment
- Smart, connected systems: Wi‑Fi/Bluetooth controllers log temp/gravity, push CIP/SOP prompts, and integrate with recipe software.
- Oxygen control mainstreamed: closed transfers, CO2-purged dry hop devices, and inline DO sensors extend hop aroma shelf life.
- Efficiency focus: heat recovery (wort-to-HLT), vessel insulation, and VFD pumps reduce thermal and electrical loads by 15–25%.
- Modular expansion: pre-piped, skid-mounted systems shorten installs and allow incremental capacity growth.
- Safety and hygiene: more EPDM/FKM gasket kits, sanitary tri-clamp upgrades, PRV validation, and home/Craft CIP sprayers.
2025 Benchmarks and Equipment KPIs
| Metric (2025) | Typical Range/Target | Notes/Source |
|---|---|---|
| Mash temp stability | ±0.5–1.0°C | Digital PID control or HERMS/RIMS |
| Brewhouse efficiency (home to nano) | 72–92% | Depends on crush/lauter design |
| Knock-out time (20 L/5 gal) | 15–30 min (plate/counterflow) | With pre-chill or glycol |
| Packaged DO target | <100–200 ppb (home); <30–80 ppb (pro) | BA/ASBC-aligned targets |
| Water use per hl beer | 3.5–5.5 hl/hl (optimized) | With reuse/recovery |
| Routine CIP contact times | 15–30 min alkaline; 10–20 min acid | Follow chemical labels |
| Core equipment lead time | 2–12 weeks (home); 12–24 weeks (pro) | OEM disclosures 2025 |
Selected sources: Brewers Association QA/sustainability resources; ASBC Methods of Analysis; OEM specifications and case studies (Ss Brewtech, Spike, Grainfather, Krones/Steinecker, GEA); industry press 2024–2025.
Latest Research Cases
Case Study 1: Closed Transfers + Spunding Preserve IPA Freshness (2025)
- Background: Enthusiast brewer observed rapid hop aroma fade and “cardboard” notes 3–4 weeks post-packaging.
- Solution: Upgraded to pressure-capable stainless conical, CO2-purged dry hop canister, fully closed transfer to purged kegs, and 10–12 psi spunding late fermentation; added inline DO spot checks via local lab.
- Results: Median packaged DO reduced from ~240 ppb to ~95 ppb; sensory panel scored hop intensity +1.1 on a 5-point scale at day 28; foam stability improved and returns/oxidation faults eliminated in club competitions.
Case Study 2: Heat Recovery Upgrade Cuts Utilities 20% (2024)
- Background: Small craft brewery faced rising gas costs and long knock-out times during summer.
- Solution: Installed wort-to-HLT plate heat exchanger for energy recovery, insulated kettles and piping, and added VFDs on pumps; standardized CIP to reduce hot water use.
- Results: Thermal energy per hl decreased by 20–22%; average knock-out time reduced by 12–15 minutes; water use improved from 5.9 to 4.4 hl/hl; payback in ~18 months.
Expert Opinions
- John Palmer, Author of “How to Brew”
- Viewpoint: “Temperature control and sanitation deliver the biggest quality gains. Add oxygen control and pressure fermentation once the fundamentals are repeatable.”
- Source: Education materials and talks, 2024–2025
- Mary Pellettieri, QA Consultant; Author of “Quality Management for Craft Beer”
- Viewpoint: “Measure DO/TPO at packaging and validate seams or closures. Data-driven SOPs turn equipment into consistency, not just stainless.”
- Source: QA seminars and consulting, 2024–2025
- Tom Shellhammer, Ph.D., Professor of Fermentation Science, Oregon State University
- Viewpoint: “Hot-side oxygen management and trub control are critical for flavor stability—design equipment and processes to minimize both.”
- Source: Academic presentations and brewer workshops, 2024–2025
Practical Tools and Resources
- Brewers Association QA, safety, and sustainability: https://www.brewersassociation.org
- ASBC Methods of Analysis (oxygen, sensory, carbonation): https://www.asbcnet.org
- OEM specs and white papers: https://www.ssbrewtech.com | https://spikebrewing.com | https://www.grainfather.com | https://www.gea.com | https://www.krones.com
- ProBrewer forums (layout, utilities, CIP): https://www.probrewer.com
- DSIRE energy incentives (US): https://www.dsireusa.org
- OSHA safety resources (CO2, confined space): https://www.osha.gov
- Inline/bench DO and QA instruments: https://www.anton-paar.com
Note: Verify power, steam, and glycol capacity; floor loading and drainage; and pressure vessel certifications (ASME/CE). Validate PRVs, use food-grade gaskets compatible with your cleaners, and document SOPs for CIP, transfers, and packaging to maintain quality and safety.
Last updated: 2025-09-29
Changelog: Added 5 FAQs, 2025 trends with KPI table, two recent case studies, expert viewpoints, and curated tools/resources specific to brewing equipment selection, upgrades, and QA
Next review date & triggers: 2026-03-31 or earlier if OEM lead times or energy benchmarks shift materially, new BA/ASBC oxygen targets are issued, or major incentives for efficiency upgrades are introduced
Share this entry
Interested in learning more about Brewing Systems including additional details and pricing information? Please use the form below to contact us!
YOLONG BREWERY EQUIPMENT FAQS
- Commercial Brewery / Craft Brewery / Microbrewery / Nanobrewery
- What is The Difference Between Craft Beer and Industrial Beer?
- The Bespoke Differences In Custom Brewing Systems
- Everything You Need to Know About Kettle Souring
- How to Choose Brewing Equipment for Your business?
- How To Choose The-Best Partner To Build Your Commercial Microbrewing System?
- Two Detection Sensors That You Need To Use In Your Brewhouse System
- Remote Control Applications in Brewing Equipment/How does it work?
- How To Clean Your Brand New Brewery Tanks?