The Ultimate Guide to Brewing Equipment Kit
Brewing beer at home can be both a science and an art. To get it just right, you’ll need the proper equipment. Whether you’re a beginner or a seasoned homebrewer, investing in the right brewing equipment kit is essential for ensuring quality, taste, and consistency in every batch. But with so many options available, it can be overwhelming. That’s where this comprehensive guide comes in.
We’ll walk you through everything you need to know about brewing equipment, from choosing the right kit, understanding the brewing process, to comparing various options on the market. Whether you’re crafting a small batch or setting up a more ambitious brewing station, you’ll find everything you need here.

Overview of Brewing Equipment Kits
Brewing equipment kits are designed to make the beer-making process easier and more accessible, whether you’re a hobbyist or working on a larger-scale project. A well-chosen kit will include everything from fermenters, bottling tools, sanitizers, to temperature controllers, allowing you to brew like a pro right at home.
Kits come in different sizes and capacities, and each is suitable for various brewing scales. Depending on your level of experience and the space you have, you’ll need to pick the right kit for your needs. Here’s a look at the components and considerations that will guide you in selecting the perfect brewing equipment kit.
Essential Brewing Equipment Guide
The core of any brewing process revolves around a set of essential equipment. While kits vary depending on price, capacity, and purpose, most include the following items:
1. Fermenter
The fermenter is where all the magic happens. Your wort (unfermented beer) transforms into alcohol here, thanks to yeast. Fermenters come in various sizes and materials, such as plastic, glass, or stainless steel. Stainless steel fermenters are often preferred for their durability and ability to maintain cleanliness.
2. Boiling Kettle
A boiling kettle is where you’ll boil your ingredients. The size of the kettle depends on the volume of beer you intend to brew. For example, a 5-gallon kettle is perfect for small batches, while larger setups may require 10 to 15-gallon kettles.
3. Wort Chiller
A wort chiller is a device that rapidly cools the boiled wort to a temperature suitable for fermentation. This step is crucial as it minimizes the risk of contamination. There are two main types: immersion and plate chillers. Plate chillers tend to cool faster, but immersion chillers are easier to clean and maintain.
4. Hydrometer
A hydrometer helps measure the specific gravity of your brew, which is essential to track the fermentation process. It allows you to determine the alcohol content of your beer.
5. Bottling Tools
Once your beer has fermented, it’s time to bottle it. Most kits include bottling buckets, bottle cappers, and siphoning equipment. These tools help you transfer your beer from the fermenter to bottles without exposing it to air, which could spoil the batch.
6. Sanitizers
Sanitation is key in brewing. Any bacteria or dirt can ruin an entire batch of beer. Most kits include sanitizing agents to ensure all your equipment stays clean and contamination-free.
Types of Brewing Equipment Kits
Below is a table categorizing the different brewing equipment kits, their specific uses, and their key features.
| Kit Type | Best For | Capacity | Main Features |
|---|---|---|---|
| Basic Homebrew Kit | Beginners | 1-5 gallons | Simple setup, includes fermenter, bottles, etc. |
| Intermediate Kit | Hobbyists | 5-10 gallons | Better tools, includes hydrometer, wort chiller |
| Advanced Brewing Kit | Experienced Brewers | 10-15 gallons or more | High-grade materials, advanced accessories |
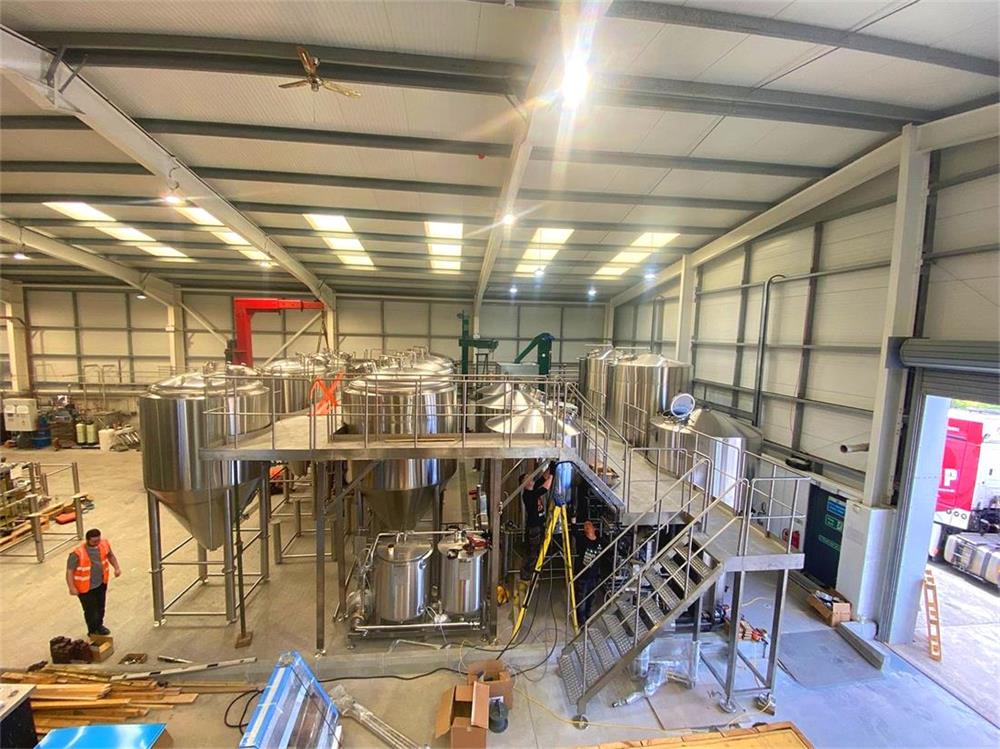
| Commercial Kit | Small-Scale Breweries | 50+ gallons | Industrial-grade, customizable, high capacity |
The Brewing Process Explained
Now that you know what’s in a brewing equipment kit, it’s time to dive into the brewing process itself. Here’s a breakdown of the steps involved, from start to finish.
1. Mashing
Mashing is the process of soaking malted barley in hot water to extract the sugars needed for fermentation. This step creates what is known as the wort, the sugary liquid that will later become your beer.
2. Boiling
Once you have your wort, it’s time to boil it. During this phase, hops are added for bitterness, flavor, and aroma. The boiling process also sterilizes the wort, removing any unwanted bacteria or enzymes.
3. Cooling
After boiling, the wort needs to be cooled quickly before yeast is added. This is where your wort chiller comes in. Cooling the wort too slowly can result in contamination, so it’s crucial to get this step right.
4. Fermentation
Once cooled, the wort is transferred to a fermenter, and yeast is added. The yeast will consume the sugars in the wort, creating alcohol and carbon dioxide. This process can take anywhere from a few days to a few weeks, depending on the recipe.
5. Bottling and Conditioning
After fermentation, it’s time to bottle your beer. A small amount of sugar is often added during bottling to carbonate the beer. Once bottled, the beer is left to condition for a few weeks before it’s ready to drink.
Brewing Kit Design, Layout, and Customization
When selecting a brewing equipment kit, it’s important to consider the design, layout, and potential for customization based on your brewing goals. Below is a table to help guide you on these considerations:
| Aspect | Key Considerations | Customization Options |
|---|---|---|
| Space Requirements | Brewing kits can be large, requiring dedicated space | Choose collapsible fermenters for smaller spaces |
| Materials | Stainless steel is durable but pricier than plastic | Opt for stainless steel for long-term use |
| Modularity | Some kits allow for easy upgrades and additions | Look for kits with modular designs |
| Automation | More advanced kits offer digital temperature controls | Choose between manual or automated brewing systems |
Brewing Equipment Suppliers and Price Ranges
To help you budget for your homebrewing setup, here’s a table of popular brewing equipment suppliers and the average price ranges for their kits.
| Supplier | Kit Type | Price Range | Notes |
|---|---|---|---|
| Northern Brewer | Beginner to Advanced | $80 – $500 | Offers a wide variety of kits and accessories |
| MoreBeer | Intermediate | $100 – $600 | Great for hobbyists, offers custom kits |
| Blichmann Engineering | Advanced to Pro | $500 – $1,500+ | High-quality, industrial-grade brewing systems |
| Williams Brewing | Beginner to Pro | $50 – $1,200 | Wide selection, including starter kits |
| Spike Brewing | Professional | $1,000 – $5,000+ | Specializes in large-scale setups |
Installation, Operation, and Maintenance of Brewing Kits
Once you’ve chosen your brewing kit, it’s essential to know how to set it up, operate it efficiently, and maintain it for long-lasting use. Below is a table outlining these steps:
| Process | Steps Involved | Maintenance Tips |
|---|---|---|
| Installation | Follow the manufacturer’s setup guide, ensure proper ventilation | Regularly check seals and connections for wear |
| Operation | Follow brewing recipes, monitor temperature and fermentation | Clean equipment thoroughly after each use |
| Maintenance | Sanitize all components before and after brewing | Store equipment in a dry, cool place |
| Upgrades | Consider adding digital controllers, larger kettles, etc. | Schedule periodic upgrades to enhance performance |
How to Choose the Right Brewing Equipment Kit Supplier
Selecting the right supplier for your brewing kit is a critical decision. Here’s a table that compares key factors to help you make the best choice:
| Criteria | What to Look For | Supplier Recommendation |
|---|---|---|
| Quality of Materials | Opt for stainless steel, high-quality plastics | Spike Brewing, Blichmann Engineering |
| Customer Support | Look for responsive customer service and support | Northern Brewer, Williams Brewing |
| Price vs. Features | Balance your budget with essential features | MoreBeer for affordable options with quality tools |
| Customization Options | Choose suppliers offering custom kits and accessories | Spike Brewing, MoreBeer |
Pros and Cons of Brewing Equipment Kits
Below is a table comparing the advantages and limitations of different brewing equipment kits.
| Aspect | Advantages | Disadvantages |
|---|---|---|
| Basic Homebrew Kit | Affordable, easy to use | Limited capacity, fewer advanced features |
| Intermediate Kit | Larger capacity, better tools | Slightly more expensive, requires more space |
| Advanced Kit | High-quality materials, larger batches | Expensive, more complex to operate |
| Commercial Kit | Scalable, industrial-grade | Very expensive, requires significant space |

FAQ
| Question | Answer |
| How much does a basic brewing kit cost? | A basic brewing kit can cost anywhere between $50 and $100, depending on size and features. |
| Can I upgrade my brewing kit later on? | Yes, many kits are modular, allowing you to add more advanced equipment over time. |
| How much space do I need for brewing? | For smaller kits, a kitchen countertop or small workspace will suffice. Larger setups require dedicated brewing space. |
| What is the most important piece of brewing equipment? | The fermenter is arguably the most critical component since this is where the fermentation process occurs. |
| How long does it take to brew beer at home? | The brewing process, including fermentation and conditioning, typically takes 4 to 6 weeks. |
Conclusion
Choosing the right brewing equipment kit can be the difference between a mediocre homebrew and a top-notch beer. Understanding the various components, the brewing process, and what to look for in a supplier will help you make informed decisions. By investing in the right kit, learning the process, and maintaining your equipment, you’ll be well on your way to crafting your perfect beer.
So, whether you’re brewing a small batch for personal enjoyment or thinking of scaling up, the world of homebrewing has all the tools you need to make your beer dreams come true.
Share this entry
Interested in learning more about Brewing Systems including additional details and pricing information? Please use the form below to contact us!
YOLONG BREWERY EQUIPMENT FAQS
- Commercial Brewery / Craft Brewery / Microbrewery / Nanobrewery
- What is The Difference Between Craft Beer and Industrial Beer?
- The Bespoke Differences In Custom Brewing Systems
- Everything You Need to Know About Kettle Souring
- How to Choose Brewing Equipment for Your business?
- How To Choose The-Best Partner To Build Your Commercial Microbrewing System?
- Two Detection Sensors That You Need To Use In Your Brewhouse System
- Remote Control Applications in Brewing Equipment/How does it work?
- How To Clean Your Brand New Brewery Tanks?

