
Beer Brewing Equipment Kit
Overview
Brewing beer at home is an age-old tradition that has seen a resurgence in recent years. Whether you’re a newbie to the craft or a seasoned brewer looking to refine your techniques, having the right beer brewing equipment kit is essential. This guide is designed to walk you through everything you need to know about beer brewing kits – from the essential components to the brewing process, equipment comparisons, and more. We’ll explore the intricacies of the brewing world with a blend of technical insight and engaging narratives that keep you hooked.

Essential Beer Brewing Equipment: What You Need
When you think of beer brewing, images of large copper kettles, bubbling concoctions, and rustic cellars might come to mind. But in reality, brewing beer at home can be both a simple and sophisticated process depending on the equipment you choose. Let’s break down the must-have equipment and their roles in the brewing process.
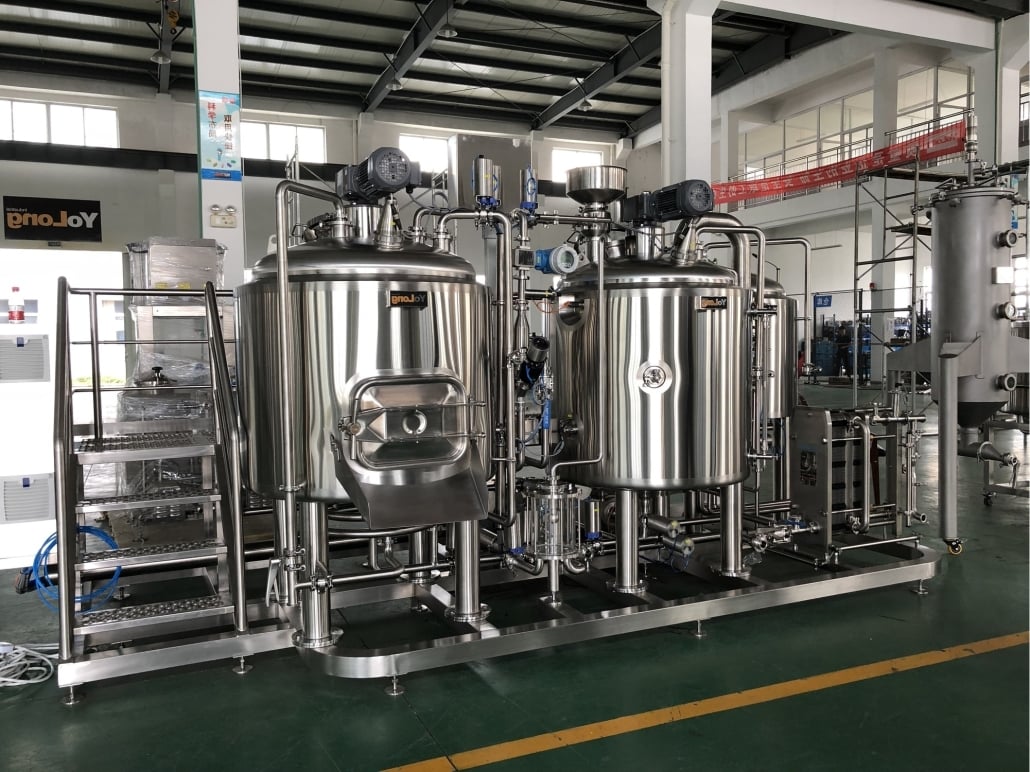
1. Brewing Kettle: The Heart of the Operation
The brewing kettle is where the magic begins. This is where water, malt, hops, and other ingredients come together to create the wort, which is the base of your beer. The size of the kettle will depend on the batch size you aim to brew, typically ranging from 3 to 10 gallons for home brewers. Stainless steel kettles are preferred due to their durability, heat distribution, and resistance to corrosion.
2. Fermenter: Where the Wort Becomes Beer
After boiling the wort, it needs to cool down before transferring it to the fermenter. The fermenter is a vessel where yeast is added, and fermentation begins. Common fermenters include plastic buckets, glass carboys, and stainless steel conical fermenters. Each type has its pros and cons, which we’ll explore later.
3. Airlock: Protecting Your Brew
An airlock is a small but crucial piece of equipment that allows gases to escape from the fermenter while preventing air and contaminants from entering. This helps avoid oxidation and ensures that your beer ferments in a controlled environment.
4. Hydrometer: Measuring Progress
A hydrometer measures the specific gravity of your wort before and after fermentation. This tool helps you track the fermentation process and determine the alcohol content of your beer. Accurate readings are essential for understanding how well your yeast is converting sugars into alcohol.
5. Bottling Equipment: Prepping for Enjoyment
Once fermentation is complete, it’s time to bottle your beer. You’ll need a bottling bucket, a siphon, and bottles with caps or a kegging system if you prefer draft beer. Proper sanitization of your bottling equipment is crucial to prevent contamination.
6. Cleaning and Sanitizing Tools: Keeping It Clean
Brewing beer involves dealing with bacteria and yeast, which means cleanliness is key. Having the right cleaning and sanitizing tools – like brushes, sanitizing solutions, and rinse aids – ensures that your equipment remains spotless and your beer tastes as intended.
Comprehensive Beer Brewing Equipment Kit Guide
Let’s dive into the specifics of each piece of equipment, exploring their variations, benefits, and ideal usage scenarios. Below is a detailed table that outlines different types of beer brewing equipment, their uses, and the pros and cons associated with each.
| Equipment | Types | Use | Pros | Cons |
|---|---|---|---|---|
| Brewing Kettle | Stainless Steel, Aluminum, Copper | Boiling wort, mixing ingredients | Durable, good heat distribution, non-reactive materials | Stainless steel is expensive; aluminum can react with wort |
| Fermenter | Plastic Buckets, Glass Carboys, Stainless Steel Conical | Fermentation, holding wort during yeast activity | Plastic is affordable; glass is inert; stainless is durable | Plastic can scratch and harbor bacteria; glass is heavy |
| Airlock | 3-piece Airlock, S-shaped Airlock | Allowing CO2 to escape during fermentation | Cheap, effective, easy to use | Fragile, requires regular cleaning |
| Hydrometer | Glass Hydrometer, Refractometer | Measuring specific gravity and alcohol content | Accurate, essential for tracking fermentation | Glass hydrometers are delicate |
| Bottling Equipment | Bottling Bucket, Kegging System | Transferring beer to bottles or kegs | Kegging is fast and convenient; bottling is traditional | Bottling can be time-consuming; kegs are expensive |
| Cleaning Tools | Brushes, Sanitizing Solutions | Cleaning and sanitizing all brewing equipment | Essential for preventing contamination | Regular cleaning is time-intensive |
Detailed Equipment Breakdown
Brewing Kettle
The brewing kettle is the cornerstone of any beer brewing kit. It’s where you’ll spend a significant amount of time during the brewing process, so choosing the right one is crucial. Stainless steel kettles are the most popular choice among home brewers due to their durability and ability to handle high temperatures without imparting any off-flavors to the wort. However, they come at a higher price point compared to aluminum or copper options. Aluminum kettles are lighter and cheaper but may react with the acidic wort, potentially affecting the taste of your beer.
Fermenter
The fermenter is where the wort is transformed into beer, so it’s important to select one that suits your brewing style. Plastic buckets are affordable and easy to handle, making them a great choice for beginners. Glass carboys, on the other hand, are completely non-reactive, which means they won’t affect the taste of your beer. However, they are heavy and can break if not handled carefully. Stainless steel conical fermenters are the top-of-the-line option, offering durability and ease of use, but they come with a hefty price tag.
Airlock
The airlock may be a small component, but it plays a big role in ensuring the quality of your beer. There are two main types of airlocks: the 3-piece airlock and the S-shaped airlock. Both are effective at allowing CO2 to escape while preventing contaminants from entering the fermenter. The 3-piece airlock is easier to clean, but it’s more prone to clogging, while the S-shaped airlock is more durable but can be harder to sanitize thoroughly.
Hydrometer
A hydrometer is an essential tool for measuring the specific gravity of your wort before and after fermentation. This allows you to track the progress of fermentation and calculate the alcohol content of your beer. Glass hydrometers are the most common type and offer accurate readings, but they can be fragile. A refractometer is a more advanced option that requires only a few drops of wort for measurement and provides quick and precise readings.
Bottling Equipment
When it comes to bottling your beer, you have two main options: using a traditional bottling bucket or a kegging system. Bottling is the more traditional method and allows you to share your beer easily, but it can be time-consuming and requires more equipment. Kegging, on the other hand, is faster and more convenient, allowing you to serve draft beer at home, but it requires an upfront investment in kegs, CO2 tanks, and a kegerator.
Cleaning and Sanitizing Tools
Cleanliness is next to godliness when it comes to brewing beer. Bacteria and wild yeast can easily spoil a batch if your equipment isn’t properly cleaned and sanitized. Brushes for cleaning bottles and fermenters, along with sanitizing solutions like Star San, are must-haves in your brewing kit. While cleaning can be time-intensive, it’s essential for ensuring that your beer comes out tasting great every time.
Understanding the Beer Brewing Process
Brewing beer is as much an art as it is a science. It’s a process that combines careful measurements with a touch of creativity. Here’s a step-by-step breakdown of the beer brewing process using your equipment kit.
1. Mashing
The brewing process begins with mashing, where malted grains are mixed with hot water in the brewing kettle to extract fermentable sugars. This step usually takes about an hour, during which the starches in the grains are converted into sugars.
2. Boiling
After mashing, the liquid, now called wort, is separated from the grain husks and boiled in the kettle. This is when hops are added to the mixture, providing bitterness, flavor, and aroma to the beer. The boiling process also sterilizes the wort, killing any unwanted bacteria or wild yeast.
3. Cooling
Once the boiling is complete, the wort needs to be cooled quickly to a temperature suitable for yeast fermentation. This is typically done using a wort chiller, which rapidly reduces the temperature and minimizes the risk of contamination.
4. Fermentation
The cooled wort is transferred to the fermenter, and yeast is added. Over the next week or two, the yeast will consume the sugars in the wort, producing alcohol and carbon dioxide. This is where the airlock comes into play, allowing CO2 to escape while keeping oxygen and contaminants out.
5. Conditioning
After fermentation, the beer is conditioned to allow flavors to mature and any unwanted compounds to settle out. This can be done in the fermenter or after bottling, depending on your preference.
6. Bottling or Kegging
Once conditioning is complete, the beer is ready to be bottled or kegged. Priming sugar is often added at this stage to provide carbonation in bottled beer. The beer is then sealed and left to carbonate for a couple of weeks before it’s ready to drink.
7. Enjoying Your Brew
Finally, after weeks of work, it’s time to enjoy the fruits of your labor. Crack open a bottle or pour yourself a draft, and savor the unique flavors of your homemade beer.
Capacity, Spaces, and Customization
When choosing a beer brewing equipment kit, it’s important to consider the capacity you’ll need, the space you have available, and any customization options you may want. The following table provides a comparison of different kits based on these factors.
| Kit Type | Capacity | Space Requirements | Customization Options |
|---|---|---|---|
| Basic Homebrew Kit | 1-5 gallons | Fits on a kitchen countertop or small table | Limited customization; includes essential equipment |
| Intermediate Kit | 5-10 gallons | Requires dedicated brewing space, like a garage or basement | Some customization; options for better kettles and fermenters |
| Advanced Kit | 10+ gallons | Large space needed, such as a home brewery room | High customization; choice of high-end equipment, additional gadgets |
Considerations for Space and Design
Before investing in a beer brewing kit, it’s crucial to assess the space you have available for brewing. A basic kit may only require a small area, but as you advance in the craft, you might find the need for a dedicated brewing space. This could be anything from a section of your kitchen to a full-fledged home brewery setup in your garage or basement. The design and layout of your brewing space should allow for easy access to all equipment, proper ventilation, and a workflow that minimizes the risk of contamination.
Customization Options
As you progress in your brewing journey, you may want to customize your equipment to better suit your brewing style. Advanced kits often offer options for upgrading to larger kettles, adding wort chillers, or incorporating a kegging system. These customizations not only improve the brewing process but also allow you to experiment with different beer styles and techniques.
Suppliers and Price Range of Beer Brewing Equipment Kits
Choosing the right supplier is as important as selecting the right equipment. Below is a table summarizing some of the top suppliers, their offerings, and the price range for different levels of brewing kits.
| Supplier | Kit Options | Price Range | Additional Perks |
|---|---|---|---|
| Northern Brewer | Basic, Intermediate, Advanced Kits | $100 – $1,000+ | Free shipping on select kits, excellent customer support |
| Midwest Supplies | Complete Kits, Starter Kits | $75 – $850 | Frequent discounts, wide range of brewing supplies |
| MoreBeer | Beginner to Pro Kits | $150 – $1,200 | Loyalty rewards program, detailed product descriptions |
| Brooklyn Brew Shop | Compact Kits, All-Grain Kits | $40 – $150 | Eco-friendly packaging, stylish design |
| Homebrew Supply | Extract Kits, All-Grain Kits | $90 – $900 | Step-by-step guides, customizable kits |
Choosing the Right Supplier
When selecting a supplier, consider factors such as price, customer service, shipping policies, and any additional perks they may offer. Northern Brewer and Midwest Supplies are known for their extensive range of products and excellent customer support, making them great options for beginners and advanced brewers alike. MoreBeer offers a rewards program that can save you money on future purchases, while Brooklyn Brew Shop caters to those with limited space and a preference for all-grain brewing.
Installation, Operation, and Maintenance of Beer Brewing Equipment
To get the most out of your beer brewing equipment, proper installation, operation, and maintenance are essential. The following table outlines the key considerations for each of these aspects.
| Aspect | Details |
|---|---|
| Installation | Ensure all equipment is assembled according to the manufacturer’s instructions. Proper ventilation is key for brewing spaces. Test equipment before brewing. |
| Operation | Follow recipes and equipment guidelines closely. Maintain consistent temperatures and sanitation throughout the brewing process. |
| Maintenance | Regularly clean and sanitize all equipment. Inspect components like airlocks, hoses, and seals for wear and tear. Store equipment in a dry, cool place. |
Installation Tips
Setting up your brewing equipment for the first time can be daunting, but careful attention to detail will make the process smoother. Start by reading through the manufacturer’s instructions to ensure all components are assembled correctly. It’s also a good idea to test your equipment with water before starting your first brew to familiarize yourself with how everything works.
Operation Guidelines
Operating your brewing equipment requires a mix of precision and patience. Follow recipes carefully, paying close attention to the temperatures and timings outlined. Keeping your equipment and workspace clean is critical at every stage of the brewing process to avoid contamination. Remember, brewing beer is a process that takes time, so don’t rush – good things come to those who wait!
Maintenance Best Practices
Proper maintenance of your brewing equipment will extend its lifespan and ensure that each batch of beer you brew is of the highest quality. After each brew, thoroughly clean and sanitize all equipment, especially those that come into contact with the wort or beer. Regularly inspect hoses, airlocks, and seals for signs of wear and replace them as needed. Finally, store your equipment in a dry, cool place to prevent damage.
How to Choose the Right Beer Brewing Equipment Supplier
Selecting the right supplier for your beer brewing equipment is a crucial step in your brewing journey. Here’s a table that helps you evaluate different suppliers based on key criteria.
| Criteria | Considerations | Importance |
|---|---|---|
| Reputation | Look for suppliers with positive reviews and a good track record. | High – Ensures reliability and quality |
| Product Range | A wide selection of kits and equipment allows for better customization. | Medium – More options for growth |
| Customer Support | Responsive and knowledgeable support is essential, especially for beginners. | High – Helpful for troubleshooting |
| Price | Compare prices across suppliers, but don’t sacrifice quality for cost. | High – Value for money is key |
| Shipping and Returns | Check shipping costs and return policies before purchasing. | Medium – Hassle-free transactions |
Evaluating Suppliers
When evaluating suppliers, consider their reputation within the brewing community. Online reviews and recommendations from other brewers can provide valuable insights into the quality of both the products and the customer service. It’s also worth considering the range of products offered – a supplier with a broad selection allows you to grow and customize your brewing setup over time. Finally, price is always a factor, but be sure to weigh the cost against the quality and features of the equipment you’re purchasing.
Comparing Advantages and Limitations of Different Beer Brewing Equipment Kits
Not all beer brewing equipment kits are created equal. Here’s a comparison of the advantages and limitations of different types of kits, so you can choose the one that best fits your needs.
| Kit Type | Advantages | Limitations |
|---|---|---|
| Basic Kits | Affordable, includes all essential equipment, easy to use | Limited capacity, fewer customization options |
| Intermediate Kits | Greater capacity, better quality equipment, some customization options | Higher cost, requires more space |
| Advanced Kits | High-quality, durable equipment, extensive customization options | Expensive, requires significant space and investment in additional tools |
Which Kit is Right for You?
Choosing the right kit depends largely on your experience level, the space you have available, and your budget. Basic kits are great for beginners who are just dipping their toes into the world of brewing. They’re affordable and come with everything you need to get started, but they may lack the capacity and customization options that more advanced brewers crave. Intermediate kits strike a balance between affordability and functionality, offering better equipment and more options for those looking to expand their brewing skills. Advanced kits are designed for serious brewers who are ready to invest in top-of-the-line equipment and create professional-quality beer at home.
FAQ
Here are some frequently asked questions about beer brewing equipment kits, along with detailed answers to help guide you through the process.
| Question | Answer |
|---|---|
| What size brewing kettle do I need? | A 5-gallon kettle is sufficient for most beginners, but consider a 10-gallon kettle if you plan to brew larger batches. |
| Can I use a plastic fermenter for all types of beer? | Yes, but be cautious with highly acidic beers, as they can cause plastic to degrade over time. Glass or stainless steel is recommended for such brews. |
| How often should I replace my airlock? | Airlocks generally last for years with proper care, but replace them if they crack or show signs of wear. |
| Is home brewing expensive? | Initial setup can be pricey, but the cost per batch is often cheaper than buying craft beer. |
| Do I need special permits for home brewing? | Most states allow home brewing without permits as long as it’s for personal use. Check local laws. |
| How long does it take to brew beer? | The brewing process can take about 4-6 hours, plus additional time for fermentation and conditioning. |
Share this entry
Interested in learning more about Brewing Systems including additional details and pricing information? Please use the form below to contact us!
YOLONG BREWERY EQUIPMENT FAQS
- Commercial Brewery / Craft Brewery / Microbrewery / Nanobrewery
- What is The Difference Between Craft Beer and Industrial Beer?
- The Bespoke Differences In Custom Brewing Systems
- Everything You Need to Know About Kettle Souring
- How to Choose Brewing Equipment for Your business?
- How To Choose The-Best Partner To Build Your Commercial Microbrewing System?
- Two Detection Sensors That You Need To Use In Your Brewhouse System
- Remote Control Applications in Brewing Equipment/How does it work?
- How To Clean Your Brand New Brewery Tanks?