Beer Home Brewing Equipment
Overview of Beer Home Brewing Equipment
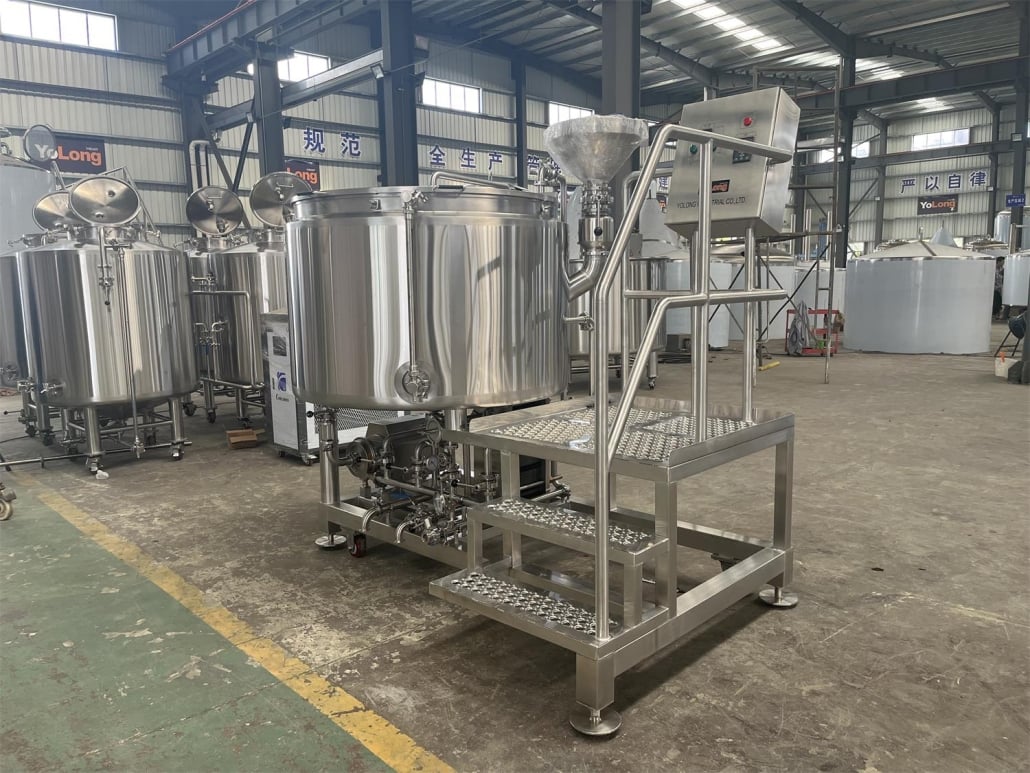
Home brewing equipment ranges from basic starter kits to high-end, professional-level systems. Choosing the right setup depends on your goals, budget, and available space. Generally, essential equipment includes a fermenter, a brew kettle, and bottles for storage, but a fully stocked setup will include other items like hydrometers, siphons, and wort chillers. This section provides a detailed overview of each component and helps you determine which equipment is right for you.
Essential Equipment for Home Brewing
Every home brewer starts with the basics, but advanced brewers might add specialized equipment to achieve specific flavors and styles. Here’s a breakdown of what each piece of equipment does and why it matters in the brewing process.

Guide to Essential Home Brewing Equipment
| Equipment | Description | Why It’s Important |
|---|---|---|
| Brew Kettle | Large pot where brewing begins, allowing you to heat water, dissolve ingredients, and boil wort (pre-ferment beer mixture). | Controls the beer’s base flavors through boiling, which extracts sugars and flavors from the grains. |
| Fermenter | A sealed container where fermentation occurs after boiling, allowing yeast to convert sugars into alcohol. | Essential for the alcohol formation process and for preventing oxygen exposure, which could spoil the beer. |
| Airlock | A device attached to the fermenter that releases CO2 during fermentation without letting oxygen in. | Protects the beer from contamination while allowing gases to escape, preventing pressure buildup. |
| Thermometer | Tool for monitoring temperature, which is crucial for consistent brewing and yeast activity. | Ensures precision in each brewing phase; yeast requires a specific temperature range to function properly. |
| Hydrometer | Instrument used to measure the beer’s density and potential alcohol content before and after fermentation. | Allows brewers to gauge alcohol levels and check fermentation progress accurately. |
| Wort Chiller | Cooling system used after boiling to quickly bring down the temperature of the wort. | Fast cooling prevents unwanted bacteria growth and helps maintain the desired beer flavor. |
| Bottling Equipment | Tools like bottle fillers, cappers, and bottles to prepare the beer for storage and aging. | Essential for packaging beer in a way that maintains carbonation and freshness. |
Each of these items plays a distinct role in creating the perfect batch of beer. Whether you’re a beginner or seasoned home brewer, investing in quality equipment can make all the difference in the outcome.
The Brewing Process: Step-by-Step
Home brewing follows a general sequence: preparation, mashing, boiling, fermenting, bottling, and aging. This process allows for adjustments based on desired flavors and beer style. Here’s a closer look at each step to understand how your equipment comes into play.
1. Preparation and Mashing
The brewing process starts by preparing the malted barley or other grains, which are mashed in hot water to extract sugars. This mixture, called mash, is heated and stirred in the brew kettle to create wort.
2. Boiling the Wort
After mashing, the wort is boiled, often with hops added for flavor and aroma. The boil time varies depending on the beer style, but this step is critical for sterilization and flavor development. Your brew kettle and thermometer are essential here to monitor temperature and timing.
3. Cooling and Fermentation
Once boiled, the wort is quickly cooled using a wort chiller to prepare it for fermentation. This step prevents unwanted bacteria from infecting the brew. The cooled wort is then transferred to the fermenter, where yeast is added to start the transformation into beer.
4. Bottling and Carbonation
After fermentation, the beer is transferred to bottles or kegs. Carbonation occurs naturally if the beer is bottled with a small amount of sugar or forced by adding CO2.
5. Aging
Aging can vary from a few days to several weeks. This period allows flavors to develop and harmonize, resulting in a balanced and smooth beer.
Choosing the Right Equipment for Your Space and Goals
When it comes to picking equipment, consider the space, design, customization needs, and budget. Here’s a detailed breakdown of factors to consider.
| Factor | Considerations |
|---|---|
| Space Requirements | Small setups can be accomplished with a single countertop or sink space, while larger systems might need dedicated brewing rooms. |
| Capacity Needs | Starter kits produce 1–5 gallons, while advanced setups can go up to 10 gallons or more, ideal for sharing with friends or larger gatherings. |
| Customizable Design | Some systems are modular and allow for add-ons as you progress in brewing; others are fixed with limited customization options. |
| Layout & Organization | Effective layouts can simplify the brewing process by keeping tools organized, whether you have a compact kitchen setup or a spacious garage brewery. |
| Budget and Quality | Low-cost kits provide basic tools, while professional-grade equipment comes with a high price but offers greater durability, precision, and brewing control. |
Top Suppliers and Price Range for Home Brewing Equipment
Finding a reliable supplier is key to ensuring quality and durability in your equipment. The following table summarizes popular suppliers, along with general price ranges, so you can get an idea of what to expect.
| Supplier | Equipment Quality | Price Range | Reputation |
|---|---|---|---|
| Northern Brewer | Beginner to advanced home brewing kits | $50–$500+ | Known for high-quality beginner kits. |
| BrewDemon | Basic to mid-range fermenters | $75–$300 | Offers innovative fermenting solutions. |
| Home Brew Ohio | Basic kits and equipment | $40–$250 | Affordable kits for beginners. |
| Grainfather | Advanced brewing systems | $800–$2000 | High-end, all-in-one systems for experts. |
| MoreBeer | Wide range of tools | $60–$500+ | Extensive selection for custom setups. |
By selecting a supplier based on their offerings and price, you can match your budget and needs with an appropriate level of quality.
Installation, Operation, and Maintenance of Brewing Equipment
Proper setup and maintenance will ensure your equipment lasts and operates efficiently.
| Aspect | Details |
|---|---|
| Installation | Follow supplier instructions closely; certain equipment like fermenters and chillers may require professional setup. |
| Operation Tips | Regular cleaning after each use is essential. Learn to operate tools at each step to avoid contamination or mishaps. |
| Maintenance | Regularly sanitize all equipment, particularly fermenters, bottles, and tubing. Inspect seals and valves for wear. |

FAQs
| Question | Answer |
|---|---|
| What’s the minimum equipment needed to start home brewing? | Basic kits with a brew kettle, fermenter, airlock, and bottles can get you started on small-batch brewing. |
| Can I brew beer in my kitchen? | Yes! Small batches are possible in most kitchens if you can set aside some counter space and ensure proper ventilation. |
| How long does home brewing take? | The brewing process itself takes 4–6 hours, while fermentation and aging take 1–4 weeks, depending on the beer style. |
| What’s the cost of a home brewing setup? | Starter kits range from $40–$200, while more advanced setups can go up to $1,000 or more. |
| Is home brewing safe? | Yes, with proper sanitization and equipment handling, home brewing is safe. |
Share this entry
Interested in learning more about Brewing Systems including additional details and pricing information? Please use the form below to contact us!
YOLONG BREWERY EQUIPMENT FAQS
- Commercial Brewery / Craft Brewery / Microbrewery / Nanobrewery
- What is The Difference Between Craft Beer and Industrial Beer?
- The Bespoke Differences In Custom Brewing Systems
- Everything You Need to Know About Kettle Souring
- How to Choose Brewing Equipment for Your business?
- How To Choose The-Best Partner To Build Your Commercial Microbrewing System?
- Two Detection Sensors That You Need To Use In Your Brewhouse System
- Remote Control Applications in Brewing Equipment/How does it work?
- How To Clean Your Brand New Brewery Tanks?

