
Micro-Brewing Equipment
Overview: What is Micro-Brewing Equipment?
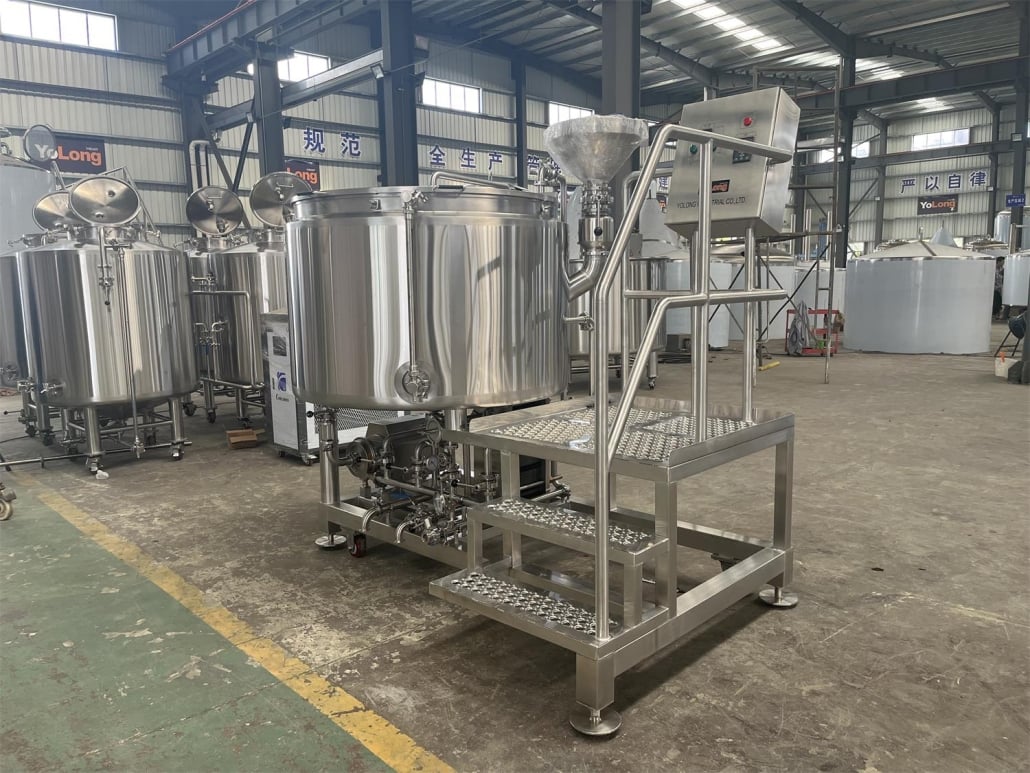
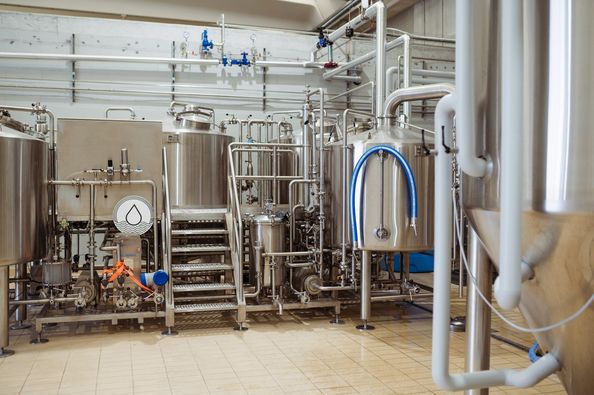
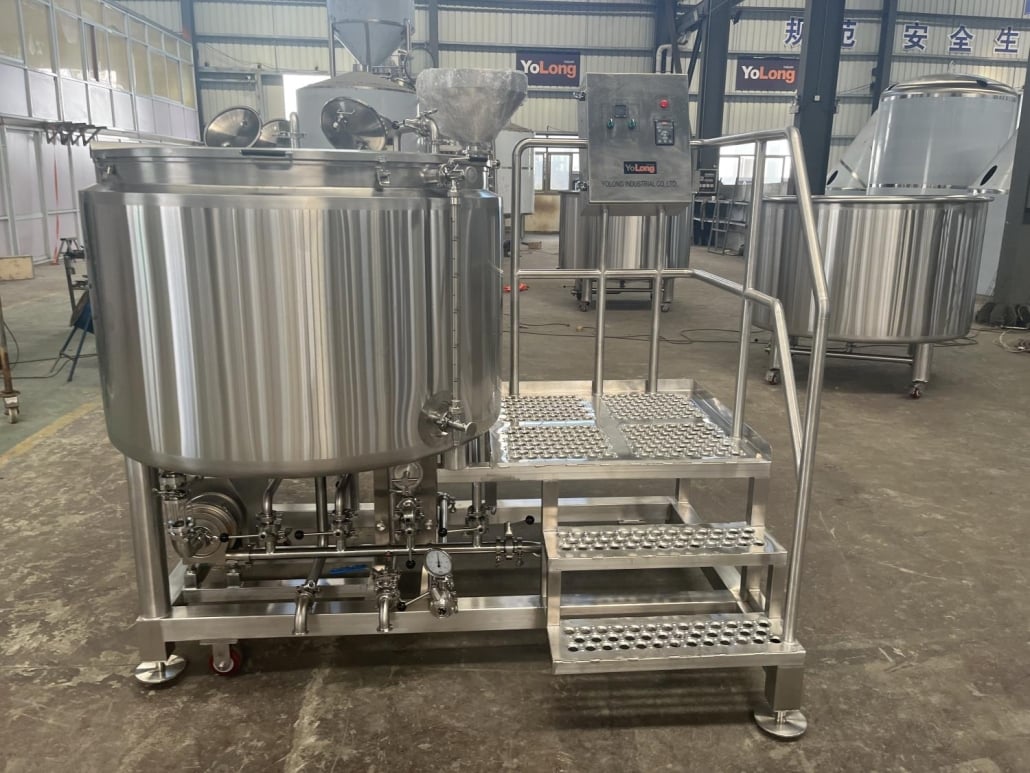
Micro-brewing equipment refers to the specialized tools and systems designed for brewing small batches of beer. Unlike home brewing, which often focuses on smaller, less precise tools, micro-brewing equipment can range from semi-professional setups to compact commercial-grade systems. These systems allow you to produce higher volumes with greater consistency, offering more control over flavor profiles and quality.
Key Components of Micro-Brewing Equipment:
- Mash Tun: For steeping grains and converting starches to sugars.
- Brew Kettle: To boil wort and add hops.
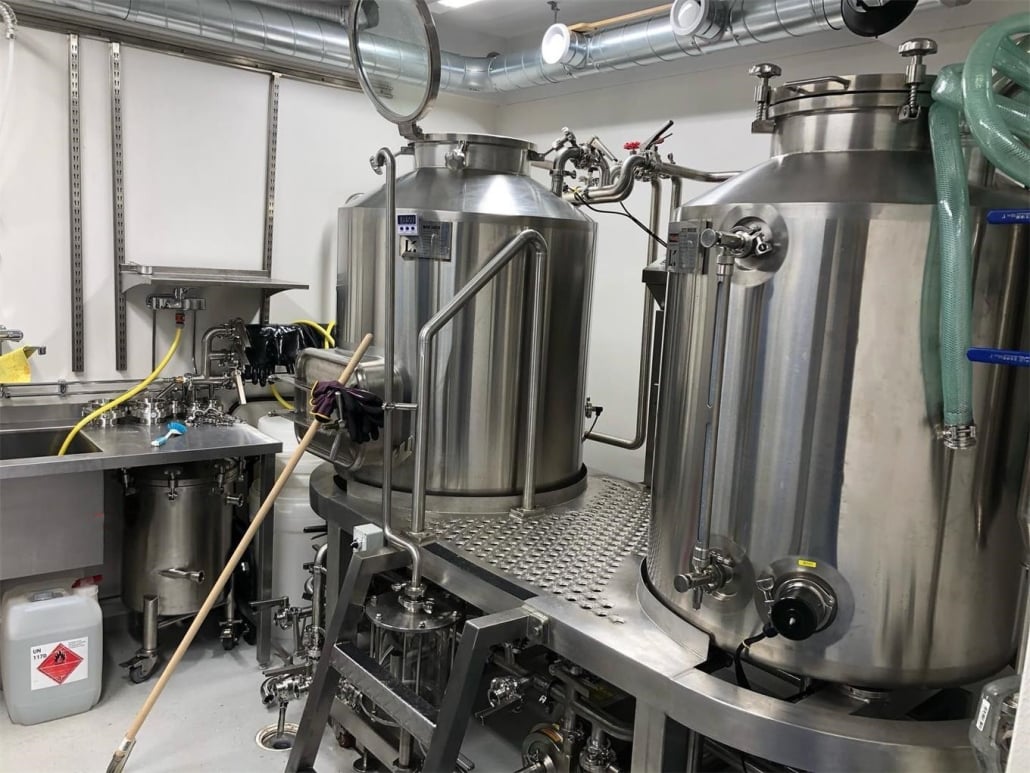
- Fermenters: Where the beer ferments and gains its alcohol content.
- Wort Chiller: Quickly cools boiled wort to a fermentable temperature.
- Kegging/Bottling Equipment: Packages your brew for storage and distribution.
Troubleshooting Common Issues with Beer Fermenters
Fermenters are the backbone of any brewing setup, but they can present unique challenges. Let’s address some common issues and how to solve them:
- Issue: Fermentation Not Starting
- Cause: Yeast might be dead or inactive.
- Solution: Use fresh yeast and ensure the wort is at an optimal temperature (usually between 68-72°F).
- Issue: Off-Flavors
- Cause: Contamination or poor temperature control.
- Solution: Sanitize thoroughly before use and maintain a steady fermentation temperature.
- Issue: Sediment in Beer
- Cause: Poor racking technique.
- Solution: Use a siphon and avoid disturbing the trub (sediment layer).
Troubleshooting requires patience and attention to detail, but resolving these problems ensures a better end product.
The Brewing Process in Micro-Brewing
Step 1: Mashing
This involves soaking crushed grains in hot water to activate enzymes that convert starches into fermentable sugars. This process determines the sweetness and body of your beer.
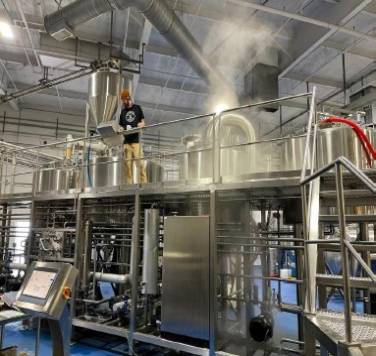
Step 2: Boiling
The wort is boiled for sterilization, and hops are added at various stages to impart bitterness, aroma, and flavor. This step also concentrates the wort.
Step 3: Cooling
Rapid cooling with a wort chiller is crucial to prepare the wort for fermentation and prevent contamination.
Step 4: Fermentation
Yeast is added to the cooled wort, initiating the fermentation process. This step can last anywhere from a week to a month, depending on the beer style.
Step 5: Packaging
Once fermentation is complete, the beer is transferred to kegs or bottles. Carbonation is either natural (via priming sugar) or forced (using CO2).
Comparison of Micro-Brewing Equipment by Features
| Feature | Entry-Level Systems | Mid-Tier Systems | Advanced Systems |
|---|---|---|---|
| Capacity | 1-3 barrels | 5-7 barrels | 10+ barrels |
| Space Needed | Small, portable setups | Dedicated brewing space | Large brewery space |
| Design | Basic with manual controls | Semi-automated with features | Fully automated, high-tech design |
| Customization | Minimal | Moderate | Extensive, highly customizable |
Top Suppliers and Price Range of Micro-Brewing Equipment
| Supplier | Products Offered | Price Range |
|---|---|---|
| Ss Brewtech | Fermenters, brew kettles | $300 – $5,000 |
| Spike Brewing | High-end brewing systems | $1,000 – $15,000 |
| Blichmann Engineering | Full brewing setups | $500 – $20,000 |
Installation, Operation, and Maintenance of Micro-Brewing Equipment
| Aspect | Details |
|---|---|
| Installation | Requires adequate space, proper ventilation, and access to water and electricity. |
| Operation | Regular monitoring of temperatures, ingredients, and timings. |
| Maintenance | Clean and sanitize after every use; check for wear and tear on seals, hoses, and components. |
How to Choose Micro-Brewing Equipment
When selecting your micro-brewing setup, keep these factors in mind:
- Batch Size: Are you brewing for personal use, a small taproom, or larger distribution?
- Budget: Entry-level systems start around $1,000, while professional setups can reach $50,000 or more.
- Features: Do you need automation or are you comfortable with manual processes?
- Space Requirements: Measure your brewing area to ensure the equipment fits comfortably.
Choosing the right setup can feel like finding the perfect pair of shoes—it’s all about fit and function.
Advantages and Disadvantages of Micro-Brewing Equipment
| Aspect | Advantages | Disadvantages |
|---|---|---|
| Control | Precise control over ingredients and processes | Requires a significant time investment |
| Quality | Ability to produce high-quality, consistent beer | High initial cost for equipment |
| Creativity | Freedom to experiment with recipes and styles | Steeper learning curve for beginners |
| Scalability | Can expand production easily with modular systems | May need dedicated space and utilities |
FAQs
| Question | Answer |
|---|---|
| What is the best equipment for beginners? | Entry-level kits with 1-3 barrel capacity are ideal for beginners. |
| How much space do I need? | A compact system requires about 50 sq. ft., while larger setups need a dedicated room. |
| Is micro-brewing profitable? | Yes, with proper planning and marketing, it can be highly profitable. |
| Can I upgrade my existing setup? | Most mid-tier and advanced systems offer modular upgrades. |
| How long does brewing take? | It takes 4-6 weeks for most beers, including fermentation and conditioning. |
Frequently Asked Questions (FAQ)
- Q1: What capacity range defines Micro-Brewing Equipment versus nano or craft-scale systems?
A1: Micro-brewing typically spans 1–15 BBL per batch. Below ~1 BBL is nano/home-pro; above ~15–30 BBL moves into small craft/commercial scale. - Q2: Which fermenter features matter most for consistency at micro scale?
A2: Jacketed, glycol-ready conicals with precise temp control, CIP spray ball, sample port, PRV, racking arm, and accurate volume markings. - Q3: What utilities do I need for a 5–7 BBL micro-brewing system?
A3: 208–480V three-phase power, 60–90 psi compressed air, glycol chiller sized ~1.5–2.0 tons per 10 BBL of cold-side load, water supply capable of 3–5 hL water/hL beer, floor drains, and adequate makeup air/venting. - Q4: How can I reduce oxygen pickup with micro-brewing equipment?
A4: Use closed transfers, purge lines and vessels with CO2, employ deaerated water where possible, and verify with inline/handheld DO meters at critical points. - Q5: What are quick wins to improve sanitation and uptime?
A5: Standardize CIP recipes (conductivity- and temperature-verified), schedule regular gasket/valve seal changes, maintain spare pump seals, and log pre-/post-CIP ATP swab or visual checks.
2025 Industry Trends: Micro-Brewing Equipment
- Smart controls: Compact PLC/HMI kits and cloud dashboards standardize mash steps, fermentation profiles, and alarms.
- Energy/water efficiency: Wider adoption of vapor condensers, heat-exchanger optimization, and CIP endpoint controls to hit 3–4 hL water/hL beer.
- LODO practices scaled down: Affordable DO probes and CO2/N2 blanketing improve shelf life for hop-forward beers.
- Modular growth: Skid-mounted brewhouses and stacked fermenters enable expansion without full facility rebuilds.
- Compliance-by-design: More equipment arrives with documentation for safety, sanitation, cybersecurity, and traceability.
2025 Benchmarks for Micro-Brewing Equipment
| Metric | 2022 Typical | 2025 Target/Best-in-Class | Notes / Sources |
|---|---|---|---|
| Water use (hL water/hL beer) | 5.0–7.0 | 3.0–4.0 (target), <3.0 (best) | Brewers Association Sustainability |
| Brewhouse energy (kWh/hL) | 10–14 | 6–9 | MBAA case studies; heat recovery |
| Inline DO post-transfer (ppb) | 80–150 | 20–50 | ASBC DO/TPO methods |
| Package loss (%) | 2.5–4.0 | 1.0–2.0 | Better purge/seams/closed transfers |
| Unplanned downtime (%) | 6–10 | <3 | Preventive + remote diagnostics |
| Startup capex (1–7 BBL) | $15k–$150k | $20k–$200k | Feature/automation dependent |
Selected sources:
- Brewers Association resources and benchmarking: https://www.brewersassociation.org
- Master Brewers Association of the Americas (MBAA): https://www.mbaa.com
- American Society of Brewing Chemists (ASBC) Methods: https://www.asbcnet.org
Latest Research Cases
Case Study 1: Heat Recovery and CIP Optimization in a 7 BBL Micro-Brewery (2025)
Background: A growing micro-brewery struggled with high utilities and long turnarounds on brew days.
Solution: Added a vapor condenser to preheat HLT feed, optimized plate HX flow balance, and implemented conductivity- and temperature-based CIP endpoints with recipe-driven PLC.
Results: Water use dropped from 5.2 to 3.6 hL/hL; brewhouse energy fell 17%; average brew-to-brew changeover cut by 22 minutes.
Case Study 2: LODO Upgrades Improve Shelf Stability for Hazy IPA (2024)
Background: Hazy IPA showed flavor fade at ~60–75 days in ambient chain.
Solution: Introduced closed, CO2-purged transfers, installed a handheld DO meter with SOP checkpoints, and standardized cold-side purges for tanks and lines.
Results: Post-transfer DO reduced to 30–45 ppb; sensory shelf life extended to ~110–120 days; returns for “oxidized” notes decreased >50%.
Expert Opinions
- Dr. Charlie Bamforth, Distinguished Professor Emeritus of Malting & Brewing Science, UC Davis
Viewpoint: “Consistency at micro scale depends on oxygen control, cleaning validation, and appropriate protein modification—get these right and quality follows.” Source: Public lectures and brewing texts. - Mary Pellettieri, Brewing Quality Consultant; Author of Quality Management for Breweries
Viewpoint: “Small teams win with disciplined QA: calibrated instruments, SPC on critical points, and validated CIP. It’s repeatability, not heroics, that builds brands.” Source: Industry workshops and QA literature. - Bart Watson, Chief Economist, Brewers Association
Viewpoint: “Micro-brewing investments that prioritize taproom margins, efficiency, and fresh rotations outperform scattershot distribution.” Source: BA economic reports and presentations.
Practical Tools/Resources
- Brewers Association: QA/QC templates, sustainability calculators, safety guides — https://www.brewersassociation.org
- ASBC Methods of Analysis (DO/TPO, pH, bitterness, micro) — https://www.asbcnet.org
- MBAA Technical Quarterly & webinars (heat recovery, CIP, packaging) — https://www.mbaa.com
- DSIRE USA: Energy/water incentives for small manufacturers — https://www.dsireusa.org
- OPC Foundation (OPC UA) for equipment interoperability — https://opcfoundation.org
- Brewer’s Friend and BeerSmith for recipe/batch planning — https://www.brewersfriend.com | https://beersmith.com
Last updated: 2025-09-01
Changelog: Added 5 targeted FAQs, 2025 trends with benchmark table and sources, two recent case studies on heat recovery/CIP optimization and LODO upgrades, expert viewpoints, and practical tools/resources tailored to micro-brewing equipment
Next review date & triggers: 2026-03-01 or earlier if BA/MBAA publish new small-brewery benchmarks, ASBC updates DO/TPO methods, or utility incentive programs change
Share this entry
Interested in learning more about Brewing Systems including additional details and pricing information? Please use the form below to contact us!
YOLONG BREWERY EQUIPMENT FAQS
- Commercial Brewery / Craft Brewery / Microbrewery / Nanobrewery
- What is The Difference Between Craft Beer and Industrial Beer?
- The Bespoke Differences In Custom Brewing Systems
- Everything You Need to Know About Kettle Souring
- How to Choose Brewing Equipment for Your business?
- How To Choose The-Best Partner To Build Your Commercial Microbrewing System?
- Two Detection Sensors That You Need To Use In Your Brewhouse System
- Remote Control Applications in Brewing Equipment/How does it work?
- How To Clean Your Brand New Brewery Tanks?